Put the screen you look at most directly in front of your centered seating position, and angle the second one in from the side. That is the right answer when one screen carries 70 to 80 percent of the work. If you genuinely split attention evenly between both, do the opposite: center the seam between the two panels on your nose and curve them symmetrically. The whole decision comes down to one question — do you have a true primary screen, or two equal ones?
I have run my desk both ways depending on what I was doing that month, and getting this wrong is why some people feel a constant low twist toward one side without knowing why. This guide covers how to pick your primary, where to sit, where the secondary belongs, and the operating-system setting that ties it together. It is about comfort and how your head and torso rotate through a workday — not a medical claim.
First Decide: One Primary or Two Equals?
Everything follows from this. An asymmetric workflow has one screen carrying 70 to 80 percent of your attention — your code editor, your main document, your design canvas — while the second holds reference material, chat, email, or a video feed you glance at. A symmetric workflow splits attention close to evenly: two documents side by side, a spreadsheet and its source, a call on one screen and your notes on the other. Be honest about which you actually are, because people default to centering the seam when most of them really have a primary.
The tell is where your eyes rest between active tasks. If they keep returning to one screen, that is your primary and it belongs square in front of you. If they genuinely settle in the middle, you are symmetric. Your answer can change with your work, which is exactly why it is worth treating the layout as something you tune rather than bolt down once. The broader geometry these positions sit inside is in the dual monitor setup guide.
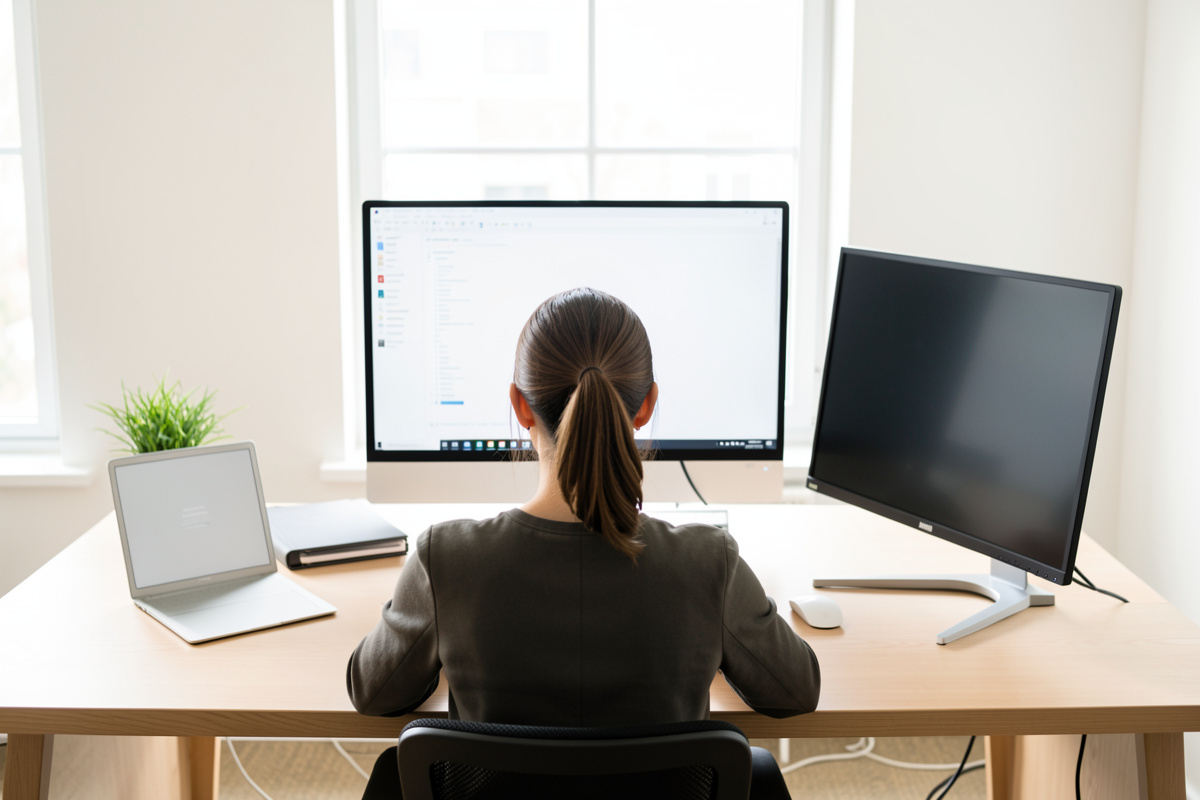
The Asymmetric Layout: Primary Square, Secondary Angled In
If you have a primary, sit centered on it, not on the gap. The primary goes directly ahead so your head faces forward for the work you do most, and the secondary sits to one side, angled in hard enough that it faces you when you turn to it. This keeps your neck and torso neutral for the 80 percent and only asks for a deliberate head turn for the 20 percent. The mistake is centering yourself on the seam when you have a primary — that points your whole body at the gap between screens and leaves you slightly rotated toward the main screen all day.
Which side the secondary goes on is mostly personal, but there are nudges: put it on the side away from a window to dodge glare, or on the side that suits your room and cable runs. If the secondary is reference you read top-to-bottom, this is also where a portrait rotation often earns its place — covered in the horizontal vs vertical monitor orientation guide. Angle and matched height still matter on both panels; the method is in the dual monitor height and angle guide.
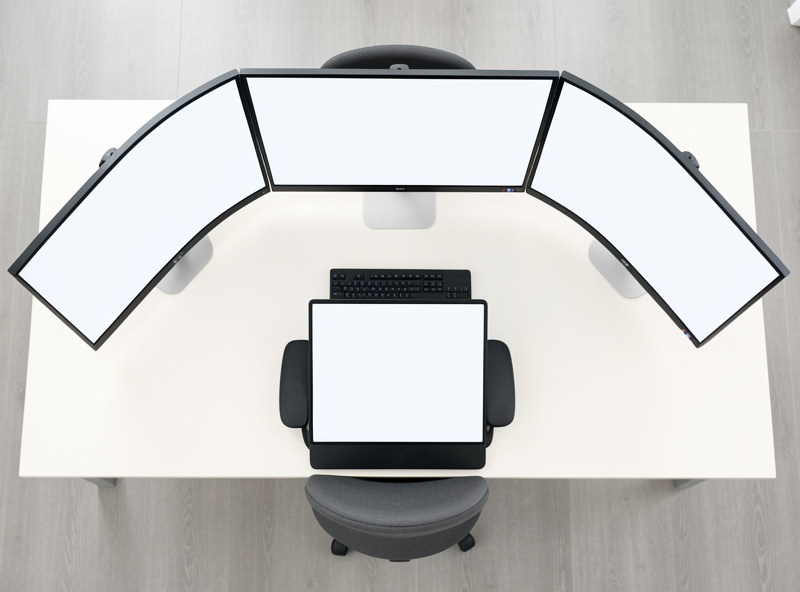
The Symmetric Layout: Seam on Your Nose
If both screens carry equal load, center the bezel seam on your centerline and curve both panels inward by an equal toe-in angle, so each faces you and your head makes the same small turn either way. This is the layout where slim bezels genuinely help, because the seam sits dead ahead where you look most. You sit centered on the gap, both screens are equals, and neither is favored.
The catch with symmetric is that the seam lands in your primary line of sight, so if you ever find yourself wishing it would disappear, that is the signal that you are either actually asymmetric or a candidate for a single ultrawide. I weighed that trade in the ultrawide vs dual monitor comparison. Symmetric is the less common real-world case than people assume — most desk work has a clear main screen — but for genuine side-by-side work it is the comfortable choice.

Distance and Height Still Apply to Both
Whichever layout you choose, the two screens still need matched height and matched distance, or the positioning advantage gets eaten by a geometry error. Match both tops to your eye line, and keep both panels the same distance from your eyes measured to each center — the convergence problem of mismatched distances is covered in the eye distance from dual monitors guide. A perfectly chosen primary that sits 4 cm lower than the secondary still drags your neck; the layout decision sits on top of the basic geometry, it does not replace it.
Set the Operating System Primary Display
There is a software half to this that people forget. Your operating system has a “primary display” setting that decides which screen shows the taskbar or menu bar, where new windows open, and where full-screen apps land. Set it to match your physical primary — the screen square in front of you — so the system’s center of gravity matches your body’s. On Windows it is in display settings as “Make this my main display”; on macOS you drag the menu bar to the chosen screen in display arrangement. It is a thirty-second change that stops new windows from opening off to your side every time.
While you are in there, set the display arrangement to match the physical layout — drag the on-screen rectangles so they sit left-to-right the way your panels actually do, and at the right relative height if one is lower. That makes your mouse cross between screens at the correct edge instead of snagging on a misaligned corner. Get the physical position and the software arrangement agreeing with each other and the whole setup stops fighting you.
Side, Above, or an L-Shape?
Most dual setups put the secondary beside the primary, but it is not the only option, and the right one depends on how much you use it. Beside-and-angled is the default and suits a secondary you reference regularly, because a head turn is quick and keeps both screens at eye level. If the secondary is something you check only occasionally — a monitoring dashboard, a chat window you glance at a few times an hour — stacking it above the primary can free desk width and keep your main screen dead ahead, though anything mounted high asks you to tip your head up, so reserve the over-primary spot for low-attention content you look at briefly.
An L-shape, with the secondary turned to face a side seat, suits a desk where you physically swivel your chair between two zones — say a main work screen and a separate screen you turn to for calls or a second task. It is less about glancing and more about rotating to a new station. The honest rule across all three is that attention should map to effort: the more you look at a screen, the less work it should take to face it. A screen you stare at all day belongs square in front; a screen you check twice an hour can ask for a turn or a glance up. Whichever placement you pick, the arm has to actually reach it, which is where the dual monitor arm comparison and your desk depth come in.
Common Positioning Mistakes
Three errors show up again and again. The first is centering on the seam when you have a clear primary — your body ends up rotated toward the main screen all day for a layout that only makes sense if the screens are equals. The second is over-angling the secondary so far to the side that facing it means twisting your torso, not just turning your head; pull it in and angle it harder instead. The third is the software half: leaving the operating system primary display set to the wrong screen, so windows and full-screen apps keep opening off to your side. None of these are about the monitors themselves — they are layout decisions, and all three are free to fix once you have named which screen is primary and set the geometry to match.
That is the core of it: pick your primary honestly, sit centered on the screen that earns it, angle the other one in, and keep the height and distance matched across both. Treat it as a setting you revisit when your work changes, not a monument. If you want to keep building out the geometry, start with the pillar dual monitor setup guide, then square the panel height and angle and viewing distance, decide on orientation, and if you are still choosing hardware, weigh it against an ultrawide. The input side that completes the picture is the keyboard and mouse positioning guide.