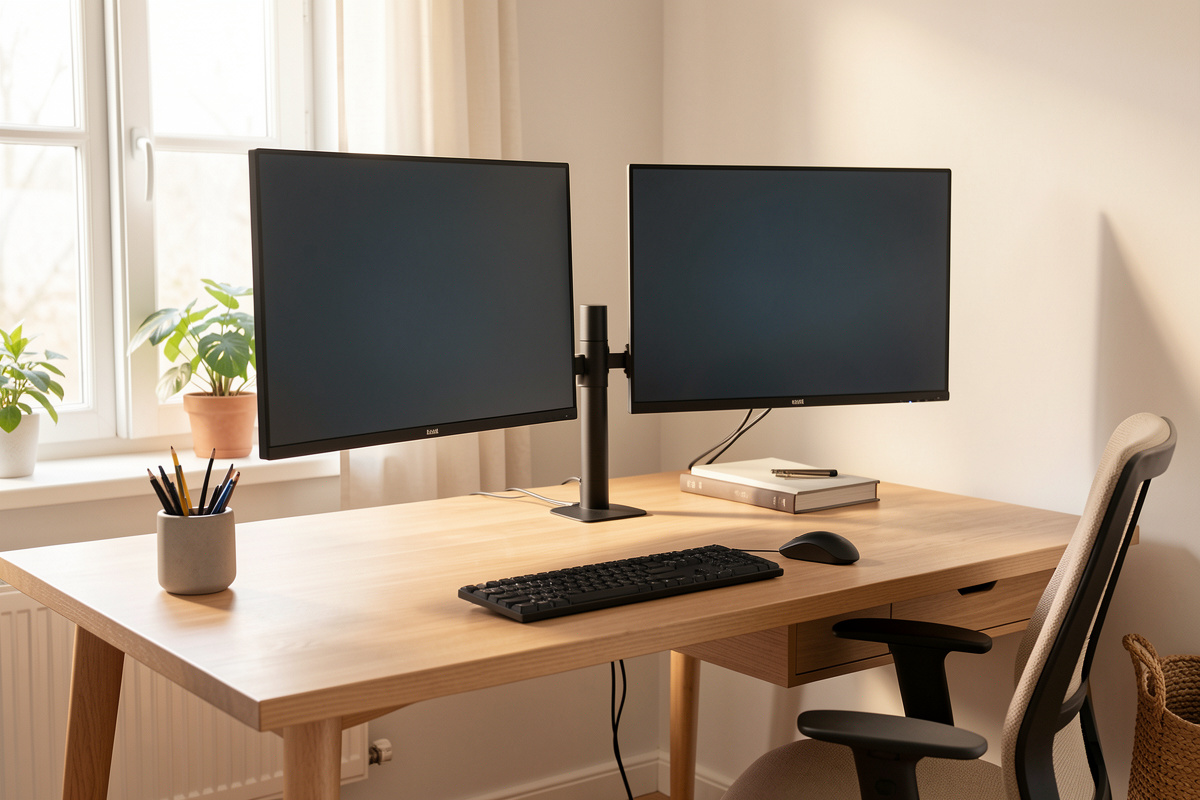
A dual monitor setup is comfortable when the geometry is right, not when the panels are expensive. Set both screen tops at roughly seated eye level, keep each panel about an arm’s length away (50–70 cm for 24–27 inch screens), and angle the two displays into a shallow arc so your head turns instead of your eyes straining sideways. Get those three numbers right and a $120 pair of monitors out-performs a $1,500 pair bolted to the wrong heights.
I have run two screens at my desk for years, and the version that finally felt invisible came from the setup log, not the shopping cart. Every time I changed a height, an angle, or a distance, I wrote down the centimeters and lived with it for a few days. This guide is that log, turned into a method you can copy. We are talking purely about comfort, fatigue, and physical geometry here — not medical outcomes — so treat every number as a starting coordinate to measure against your own body, not a prescription.
The Three Numbers That Decide a Dual Monitor Setup
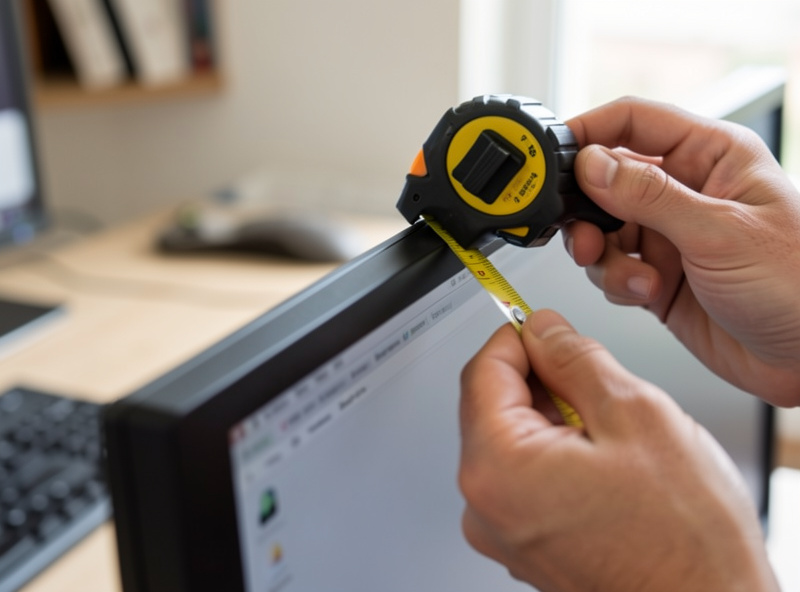
Almost every dual monitor complaint I have ever logged traces back to one of three measurements: screen height, viewing distance, or the horizontal angle between the panels. Fix those and the rest is decoration. Height controls how far your neck tilts. Distance controls how hard your eyes work to hold focus. Angle controls how far your head and torso rotate to reach the second screen. None of them costs money — they cost a tape measure and ten minutes.
The reason people skip the measuring is that two monitors look symmetrical out of the box, so the setup feels done. It is not. Stock monitor stands set the panel height for the average of nobody, and a side-by-side pair almost always sits flat instead of curved. Below I break each number down, then show how they interact once a second screen enters the picture. If you want the deep version of any single number, each section links to the dedicated guide.
Monitor Height: Both Tops at Eye Level
Set the top edge of each screen at or just below your seated eye level, so your gaze drops slightly into the middle of the panel. Measured at my desk, that puts the top bezel about 8–10 cm above the desk surface for a 27-inch screen on a low-profile arm. The aim is a relaxed neck that looks straight ahead and tilts down a few degrees, never up.
With two identical monitors the rule is simple — match them. The trouble starts when the panels are different sizes, or when one sits on the stock stand and the other on an arm. I logged a 4 cm height mismatch on my own desk once and the asymmetry was the kind of thing you do not see but do feel by the afternoon. A monitor arm is the cleanest fix because it decouples panel height from whatever stand each monitor shipped with. For the full method, including the chin-and-bezel checks I use, see the monitor height and eye line guide and the dual-screen-specific dual monitor height and angle guide.
Viewing Distance: An Arm’s Length, Scaled to Screen Size
Push both panels back until they sit roughly an arm’s length away — for most people that lands between 50 and 70 cm for 24 to 27-inch monitors, and farther as the panel grows. Bigger screens want more distance, not less, because you take in a large panel by moving your eyes across it, and a screen jammed too close forces constant micro-refocusing at the edges.
Dual setups make distance trickier because the second monitor, if it is angled, naturally sits a little farther from your eyes at its outer edge. That is fine and even helpful — your head rotates to face it, which keeps the working distance more consistent than it looks on paper. What you do not want is the primary screen pulled in close while the secondary sits far back, because your eyes have to re-converge every time you glance across. I keep both panels’ centers within about 10 cm of the same distance in my setup log. The size-by-distance math, panel by panel, is in the monitor distance by screen size guide, and the dual-specific convergence problem gets its own treatment in the eye distance from dual monitors guide.
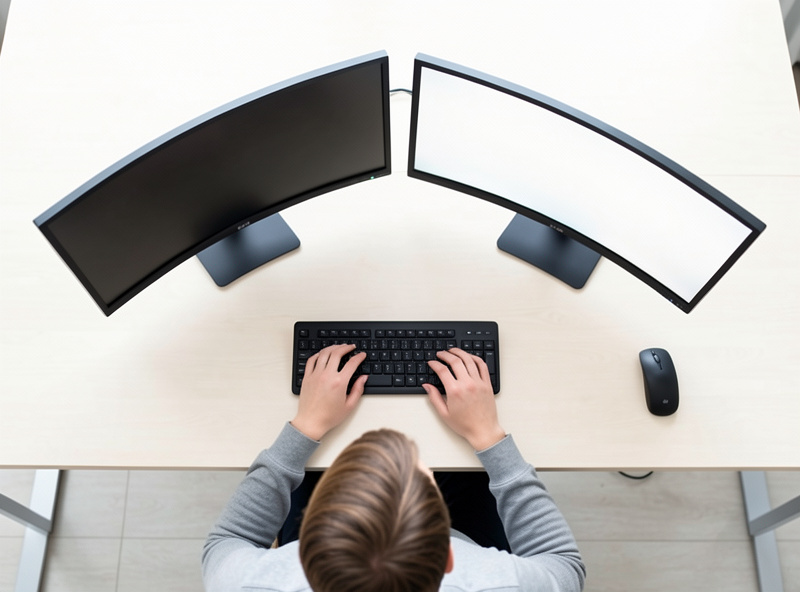
The Angle Between the Panels: Build a Shallow Arc
Two flat, side-by-side monitors form a wall. A comfortable dual setup curves that wall inward so each panel faces you. I toe each screen in by roughly 10 to 15 degrees from flat, so the inner edges sit a touch closer and the outer edges swing back. The test is simple: sit centered, look straight ahead at the seam between the screens, and each panel should feel like it is pointed at your face rather than at the wall behind you.
How aggressive the arc should be depends on how you split your work, which is really a question of whether you have a true primary screen or two equal screens. That distinction changes where you sit and how you angle, so it gets a full breakdown in the primary vs secondary monitor positioning guide. The short version: equal-use setups center the seam on your nose and curve both panels symmetrically; primary-plus-reference setups put one screen square in front and angle the second in from the side.
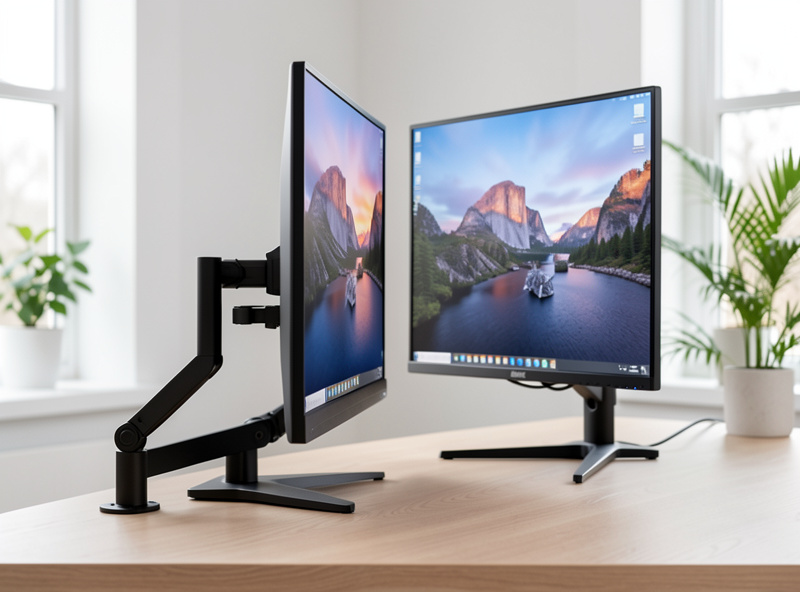
Mounting: Stock Stands, Single Arms, or a Dual Arm
Geometry is only as good as the hardware that holds it. Stock stands tilt and raise within a narrow range and eat desk depth, which is exactly the depth you need to push panels back to a proper distance. The moment you want both screens at a matched height with independent tilt, you are looking at monitor arms. For two screens you have two routes: two separate single arms, or one dual arm on a single mount. I have run both, and the choice comes down to desk space, monitor weight, and how often you reconfigure.
The non-negotiable is the load math. A monitor arm’s headline weight rating is a maximum, not a comfort zone, and gas-spring arms drift over time if you load them near the limit. Check the VESA pattern (100×100 or 75×75 on most panels), confirm your desk thickness works with the clamp or grommet mount, and stay well under the rated weight per arm. I cover the real, not-the-max load math in the monitor arm weight rating guide, the clamp-and-grommet desk-thickness reality in the monitor arm desk thickness guide, and the drift fix in the gas spring drift guide. The head-to-head on hardware choices for two screens lives in the dual monitor arm comparison guide and the older dual arm vs two single arms breakdown. If you are still deciding whether you even need an arm, start at the monitor arm guide.
| Mounting option | Best for | Height match | Desk depth freed | Typical street price |
|---|---|---|---|---|
| Stock monitor stands | Fixed setups, tight budgets | Manual, limited range | None — stands eat depth | Included |
| Two single gas-spring arms | Different-size panels, frequent reposition | Independent per screen | Most — both bases gone | $60–$220 (pair) |
| One dual arm, single mount | Matched panels, clean center pole | Shared crossbar, even | High — one clamp point | $90–$280 |
| Wall mount (VESA) | Permanent geometry, freed desk | Fixed once set | All — nothing on desk | $40–$150 |
As an Amazon Associate I earn from qualifying purchases. When I am shopping arms for two screens I start by filtering for the load rating and VESA fit rather than the brand — a dual monitor arm or a pair of single gas-spring arms both work, as long as the per-arm capacity clears your heaviest panel with margin.
Dual vs Ultrawide: When Two Screens Is the Wrong Answer
Two screens are not automatically better than one wide one. A single ultrawide removes the center bezel — the seam that sits dead ahead in a symmetric dual setup — which some people find worth the trade on its own. A dual setup wins when you want a hard visual divide between tasks, or when you want one screen rotated vertical. An ultrawide wins when you want a continuous canvas and a single cable run.
From a pure geometry standpoint the ultrawide is easier to get right because there is one panel to position, but it is heavier and wider, which changes the arm math entirely — a wide curved panel needs an arm rated and built for the leverage. I weighed the two approaches against my own setup log in the ultrawide vs dual monitor comparison, and the arm-specific requirements for the wide single panel route are worth reading before you commit. There is no universal winner; there is the one that matches how your eyes move across your work.
Orientation: Should the Second Screen Go Vertical?
Rotating the secondary monitor to portrait is the most useful dual-setup trick most people never try. A vertical panel is built for anything tall and narrow — long documents, code, chat logs, reference material you scroll rather than scan. The catch is height: a 27-inch screen turned vertical is tall enough that the top can climb above a comfortable eye line, so you often have to drop the arm lower than its landscape neighbor to keep the whole panel in a relaxed gaze.
Whether vertical actually helps you depends entirely on what lives on that second screen, and the productivity case cuts both ways. I broke down where portrait earns its place — and where it just makes you crane upward — in the horizontal vs vertical monitor orientation guide. Most monitor arms and the better stock stands support a 90-degree rotation; check that yours does before you plan around it.
Cables: The Part That Ruins a Clean Setup
A dual monitor setup doubles the cable count exactly where it shows — two power leads, two video cables, often a USB run per panel, all converging on arms that are supposed to move. If you route the cables tight to a static position, the first time you raise a screen the cable either yanks or pops out of its clip. The fix is to build a cable spine that follows the arm’s travel: leave a service loop at each joint, run the bundle down the center pole or along the arm’s channel, and only anchor it once it reaches the desk.
I treat cable routing as part of the geometry, not an afterthought, because a cable that fights the arm slowly drags a panel out of the position you measured. A simple cable management sleeve plus a few reusable ties handles most of it. The full routing method for arms that move — service loops, anchor points, and where the bundle should break — is in the cable routing for dual monitor arms guide.
Putting It Together: My Dual-Screen Build Order
When I set up two screens from scratch, I work in a fixed order so each measurement holds the next one steady. Distance first: I push both panels back to an arm’s length and lock the arm depth. Height second: I match both tops to eye level. Angle third: I toe each panel in until it faces me. Orientation fourth, if one screen is going vertical. Cables last, with the arms set to their working positions so the service loops are sized right. Reverse that order and you end up re-measuring everything twice.
The whole thing is an experiment you sit inside. Write the numbers down — desk height, eye-line height, panel distance, toe-in angle — and change one at a time. Two weeks of small logged adjustments will beat any single purchase. If your desk height itself is off, none of the monitor geometry will sit right, so square that away first using the desk height guide and, if you stand, the standing desk height guide. Then square away the input side with the keyboard and mouse positioning guide and mouse position guide — two screens are wasted if your hands are in the wrong place. Laptop-plus-external readers should pair this with the laptop ergonomics and docking guide, and anyone fitting this into a small room should read the small-space desk guide. The chair under all of it matters too; the ergonomic chair guide covers fitting that to your body.
The Dual-Monitor Mistakes I See Most Often
The same handful of geometry errors show up again and again, and none of them are about the monitors themselves. The most common is the center gap — leaving a wide bezel-and-air seam between the panels because that is how they land when you set them on stock stands. That seam sits exactly where your most-used line of sight points, so close the gap and angle the panels in. The second is the mismatched-height pairing, usually a laptop screen parked next to a big external. A laptop on the desk surface puts its screen far below eye level, which drags your whole head down; a riser or an arm that lifts it fixes the geometry, and the laptop ergonomics guide covers the docking side.
The third is over-distancing the second screen. People angle the secondary so far back that its center sits 20 cm farther than the primary, then wonder why glancing across feels like work — your eyes have to re-converge and re-focus for the longer throw. Keep both panel centers within about 10 cm of the same distance. The fourth is ignoring the chair and desk underneath: perfect monitor geometry on a desk that is 4 cm too tall just relocates the strain to your shoulders. Square the foundation with the desk height guide and a chair fitted by the method in the ergonomic chair guide before you obsess over the screens.
Matching the Geometry to How You Actually Work
There is no single correct dual-monitor layout because the right geometry follows your task split. If one screen does 80 percent of the work and the other holds reference material, you have an asymmetric setup: primary square in front, secondary angled in from the side, and you never sit centered on the seam. If you genuinely split attention 50/50 — two documents side by side, a video call beside your work — you have a symmetric setup, and the seam belongs on your nose with both panels curved evenly. Trying to run an asymmetric workflow on a symmetric layout is why some people feel a constant low-grade twist toward one side.
This is also where orientation and screen choice feed back in. A reference-heavy secondary is a strong candidate for portrait rotation; an even split usually wants two matched landscape panels. And if you find yourself wishing the seam would just disappear, that is the signal to weigh a single ultrawide instead. I keep my own answer to all of this in the setup log, revisited whenever my work changes — because the geometry that fit me when I was writing all day is not the one that fits a month of spreadsheets. Treat the layout as something you tune, not something you set once and forget, and link the input gear to it: two screens with your hands in the wrong place, covered in the keyboard and mouse positioning guide, still finishes the day tired.
Frequently Asked Questions
How far apart should two monitors be?
There should be no gap. Push the inner edges of both panels together so the bezels nearly touch, then angle each screen inward 10 to 15 degrees to form a shallow arc. A gap in the middle forces extra head movement and pulls your focus off center.
Should both monitors be the same height?
Yes, match the top edges of both screens at or just below seated eye level. A height mismatch is hard to see but fatiguing over a workday because your neck settles to the lower screen. Monitor arms make matching two different-sized panels far easier than stock stands.
Is a dual monitor or ultrawide setup better?
Neither universally. Dual screens give you a hard visual divide between tasks and let you rotate one vertical. An ultrawide removes the center bezel and runs one cable. Choose by how your eyes move across your work, not by which sounds more impressive.
Which monitor should be the primary one?
Put the screen you look at most square in front of your centered seating position, and angle the second one in from the side. If you split work evenly between both, center the seam between them on your nose instead and curve both panels symmetrically.
Do I need a dual monitor arm or two single arms?
Two single arms give independent height and depth per screen, which suits different-sized panels and frequent repositioning. A single dual arm is cleaner with one clamp point and suits matched panels. Both work if the per-arm load rating clears your heaviest monitor with margin.
Can I rotate one monitor to portrait orientation?
Yes, if your arm or stand supports 90-degree rotation, which most do. Portrait suits tall, narrow content like documents and code. Watch the height though: a 27-inch panel turned vertical is tall enough that you often need to mount it lower than its landscape neighbor.