A good laptop ergonomics setup starts by accepting an uncomfortable truth: a laptop, used as a laptop, can never be set up well. The screen is bolted to the keyboard, so you cannot put both at the right height at once — and no posture trick, no “sit up straight,” no expensive bag rescues that. The fix isn’t effort; it’s geometry. You separate the screen from the keyboard, and the moment you do, a laptop setup follows the exact same rules as a desktop one. Here’s how, ranked by how far you want to go. Comfort-and-geometry guidance, not medical advice.
I work across two machines and travel with a laptop regularly, so this is a setup I’ve built and rebuilt more times than I can count. The principle never changes: screen up at eye line, keyboard down at elbow height, and since the laptop can’t do both, something has to give.
Why a laptop can’t be set up well as-is
Run the two rules side by side and the conflict is obvious. The keyboard wants to be at your seated elbow height so your forearms are level. The screen wants its top at or near your eye line so your head stays level. On a laptop those two surfaces are about 1 cm apart, hinged together. Put the keyboard at elbow height and the screen is down by your stomach — you stare down at it all day. Raise the laptop so the screen hits eye line and the keyboard is up at your chest — your arms float and your shoulders climb.
There is no head or hand position that resolves this, because it’s a dimensional conflict, not a discipline problem. Anyone telling you to fix laptop comfort by “improving your posture” is asking you to fight geometry with willpower. You lose that fight by mid-afternoon. The only real answer is to break the screen and keyboard apart.

The three setups, compared
There are three real ways to split the screen from the keyboard, in rising order of cost and quality. Here’s how they stack up.
| Setup | What you add | Screen at eye line? | Best for |
|---|---|---|---|
| Laptop riser + external keyboard | A stand and a keyboard/mouse | Close — laptop screen lifts to near eye line | Travel, hot-desking, small budgets |
| Dock + external monitor | Dock, monitor, keyboard, mouse | Yes — full-size screen at exact eye line | A fixed home or office desk |
| Dock + monitor, laptop as second screen | As above, laptop on a riser beside | Yes — monitor primary, laptop angled secondary | People who want the extra screen real estate |
All three share the same non-negotiable: an external keyboard and mouse. The instant you raise the laptop’s screen, you’ve made its built-in keyboard unreachable at the right height, so a separate keyboard at elbow height isn’t optional — it’s the other half of the fix.
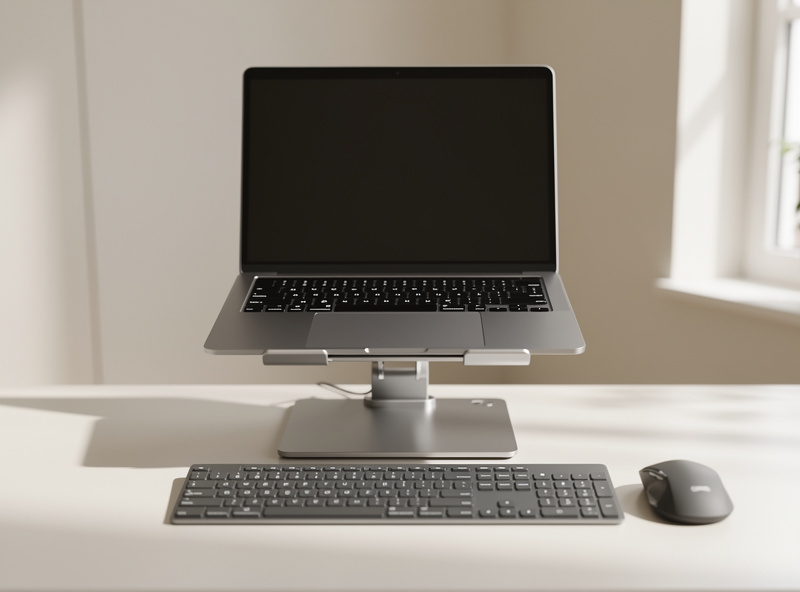
Setup 1: Laptop riser + external keyboard (the travel-friendly minimum)
This is the cheapest setup that’s actually correct, and it’s what I use on the road. Lift the laptop on a stand until the top of its screen sits at or just below your eye line, then add a compact external keyboard and mouse at elbow height in front of it. The laptop’s own screen becomes your display; its built-in keyboard goes unused. That’s the whole trick.
The honest limitation: a 13-to-15-inch laptop screen is small to sit at full eye-line distance, so you’re trading screen size for correct height. For travel and short sessions that’s an easy trade. A folding adjustable laptop stand packs flat and gets the screen up; pair it with a slim wireless keyboard and mouse and you’ve got a correct setup that fits in a bag. It’s the single highest-value upgrade for anyone who works on a laptop away from a desk.
Setup 2: Dock + external monitor (the home-desk best)
At a fixed desk, this is the setup worth building. Connect the laptop to an external monitor — through a single-cable USB-C dock if your machine supports it, which keeps the desk clean and handles power, display and peripherals in one plug — and set that monitor to eye line by the usual rules. Keyboard and mouse go at elbow height. The laptop now lives wherever’s convenient (lid open or closed) and you’re working at a full-size screen at the correct height. This is just a desktop setup that happens to be powered by a laptop.
A USB-C docking station is the piece that makes this clean — one cable to the laptop, everything else stays plugged into the dock, so connecting at the start of the day is a single motion. Check that the dock supports your monitor’s resolution and refresh rate before buying; a cheap dock that caps your screen at 30 Hz is a false economy.
Disclosure: As an Amazon Associate I earn from qualifying purchases. The links here are category search links to gear I use myself; they cost you nothing extra. This is comfort-and-geometry guidance, not medical advice.
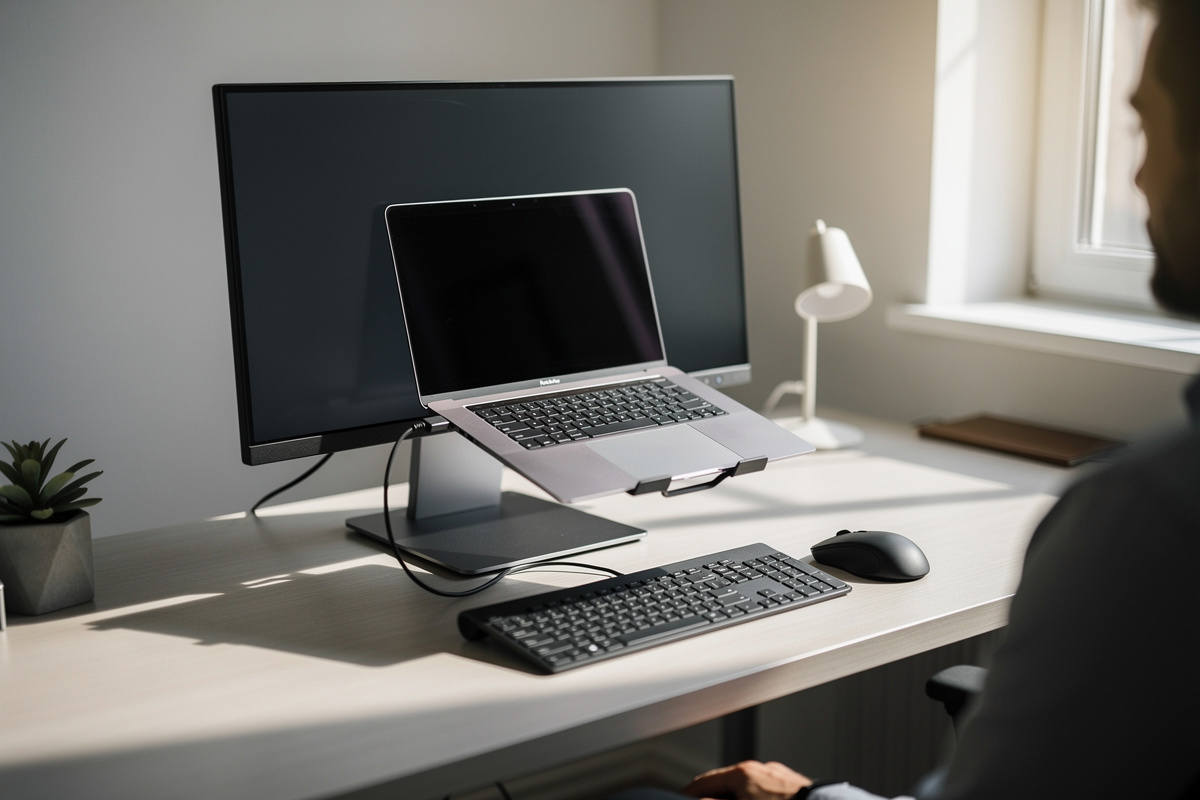
Setup 3: Dock + monitor with the laptop as a second screen
If you want the extra screen real estate, run the external monitor as your primary at eye line and put the laptop on a riser beside it as a secondary, angled inward. You get a big correct main screen plus the laptop’s display for chat, reference, or monitoring. Treat it like any dual-monitor setup: the monitor owns your gaze and sets the eye line, the laptop is the glance-to screen, and you match their top edges so looking across doesn’t become looking down. It’s the most screen for the most desk, and the geometry is identical to two desktop monitors.
Lid open or closed when docked?
A common question: if you’re docked to an external monitor, should you leave the laptop lid open or shut it (clamshell mode)? It’s mostly preference, with one real consideration — thermals. A laptop running closed and docked under load can trap heat against its own keyboard deck; most modern machines handle it fine, but if yours runs hot, leaving the lid cracked open helps it breathe. If you leave it open, you’ve essentially got setup 3 and might as well use the screen. Closed-and-tucked-away is cleaner; open-and-angled gives you the extra display. Neither is wrong.
What doesn’t work
A few “solutions” that don’t fix the geometry: a lap desk (still a laptop, screen still too low); a fancy ergonomic bag (carries the problem, doesn’t solve it); “just lower the chair” (drops your elbows below the desk to chase the low screen, breaking the keyboard height instead). And the classic — buying a bigger, heavier laptop for the bigger screen. A bigger screen that’s still bolted to the keyboard is still in the wrong place; you’ve just made the wrong place heavier to carry. The fix is always separation, never a different laptop.
The verdict
Accept that a laptop can’t be set up well as a laptop, then split the screen from the keyboard. On the road, a folding stand plus a packable keyboard gets you correct in a bag. At a desk, a USB-C dock to an external monitor at eye line is the setup worth building, with the laptop as an optional second screen if you want the space. An external keyboard at elbow height is mandatory in every case. Do that and a laptop stops being an ergonomic compromise and starts being just another machine driving a properly-dialed desk.
Related reading
- The Correct Desk Height: Full Setup Guide — the geometry every setup here follows.
- Monitor Height & Eye Line — set the docked screen’s height correctly.
- Monitor Distance by Screen Size — how far back the external screen wants to sit.
- Desk Height Calculator vs. the Elbow Rule — find your keyboard height.
- Tools I Actually Use — the measuring kit and log.
- FlexiSpot E7 Wobble Test — if you’re considering a sit-stand frame for that docked desk.
Frequently Asked Questions
How do I set up a laptop ergonomically?
Separate the screen from the keyboard, because a laptop cannot put both at the right height at once. Raise the laptop on a stand until the screen top is near eye line, or dock it to an external monitor set to eye line, and add an external keyboard and mouse at elbow height. The keyboard is mandatory the moment you lift the screen.
Do I really need an external keyboard with a laptop stand?
Yes. As soon as you raise the laptop so its screen reaches eye line, its built-in keyboard is up at your chest and unusable at the correct height. A separate keyboard and mouse at elbow height are the other half of the fix, not an optional extra. Without them, raising the laptop just trades a screen problem for a keyboard problem.
Is a laptop riser or a docking station better?
A riser plus external keyboard is the cheaper, travel-friendly option, but you keep the small laptop screen. A USB-C dock to an external monitor is better at a fixed desk because it puts a full-size screen at the exact eye line. Many people use a dock at home and a folding stand on the road.
Should I close my laptop lid when docked to a monitor?
It is mostly preference. Closing the lid in clamshell mode is cleaner and saves desk space, while leaving it open lets you use the laptop screen as a second display. The one real consideration is heat: a laptop running closed under heavy load can trap warmth, so if yours runs hot, leave the lid cracked open to help it breathe.
Can good posture fix laptop discomfort without extra gear?
No. The discomfort comes from a dimensional conflict, not a posture habit: the screen and keyboard are fixed about a centimeter apart, so one of them is always at the wrong height. No sitting position resolves that. The only real fix is to separate the screen from the keyboard with a stand or dock plus an external keyboard.