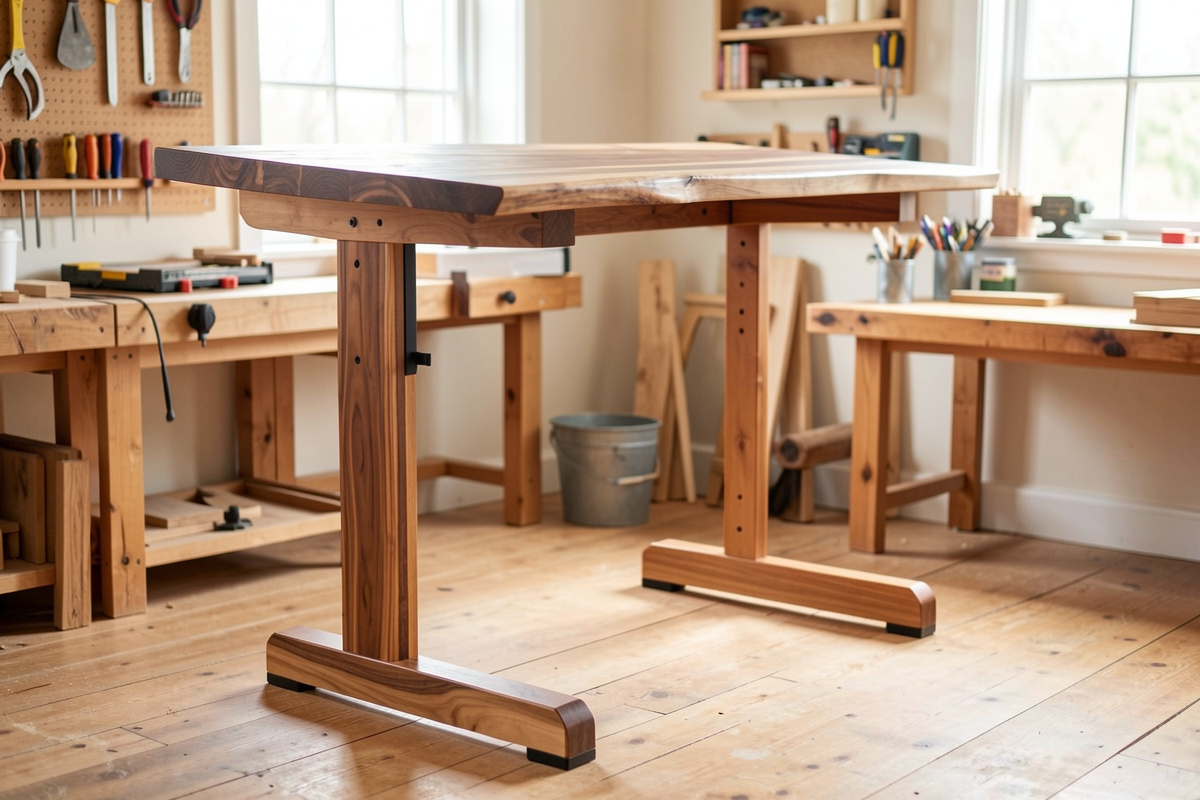
The DIY standing desk top on frame route is one of the best-value moves in this whole category, and it’s the one the desk companies will never recommend to you. The logic is simple: the frame is the engineering, and the top is a flat surface with some screw holes. Buy a good frame on its own, mount a top you choose, and you can beat factory laminate on quality and dimensions, often for less money. I’ve gone this route on my own setup and it’s genuinely satisfying — but there are real gotchas that turn a great idea into a sluggish, wobbly desk if you ignore them. This is the honest walkthrough: what works, what bites, and how to get it right the first time.
The framing this site always holds: this is a comfort, fatigue, and geometry article, not a medical one. I’m talking about materials, mounting, and how a top affects the frame’s behaviour — practical and mechanical, no health claims.
Why buy the frame and add your own top
Factory tops are a compromise: the manufacturer offers two or three sizes in a couple of finishes, usually laminate over particleboard, priced to make the desk look complete. Go DIY and three things open up. You pick the exact dimensions for your space instead of the nearest stock size. You pick a material that’s actually nice — solid wood, butcher block, a well-finished plywood panel — that often outclasses factory laminate. And depending on what you choose, you can spend less than the bundled top costs. The frame does all the hard work; you’re just giving it a better surface to hold.
How this site stays free: a couple of links below go to Amazon, and as an Amazon Associate I earn from qualifying purchases. No cost to you, only gear I’d put on my own desk, and this is comfort-and-geometry guidance, not medical advice.
The three gotchas that bite people
1. Weight: your top counts against the frame’s capacity
This is the one that surprises everyone. The frame’s weight rating is the total it lifts, and the top is part of that total. A thick solid-wood slab can weigh a serious fraction of the rating before you’ve placed a single monitor. Go too heavy and the lift gets sluggish and you’ve eaten into the capacity you need for your actual gear. Weigh your top, subtract it from the rating, and make sure what’s left comfortably covers your monitors and arms with margin. Beautiful and heavy is fine; beautiful and heavier than the frame wants is a desk that strains.
2. Thickness: it eats your height range at both ends
Top thickness adds directly to every height the frame produces. A thick slab raises your minimum and maximum sitting and standing heights by its own thickness. For most people that’s fine, but if you’re short and already near the frame’s minimum, a thick top can push the desk above your correct seated height — and if you’re tall and near the max, it can help or hurt depending on the numbers. Measure your correct seated and standing elbow heights first, then account for the top’s thickness in the math. The top isn’t just a surface; it’s part of the height equation.
3. The bolt pattern has to line up
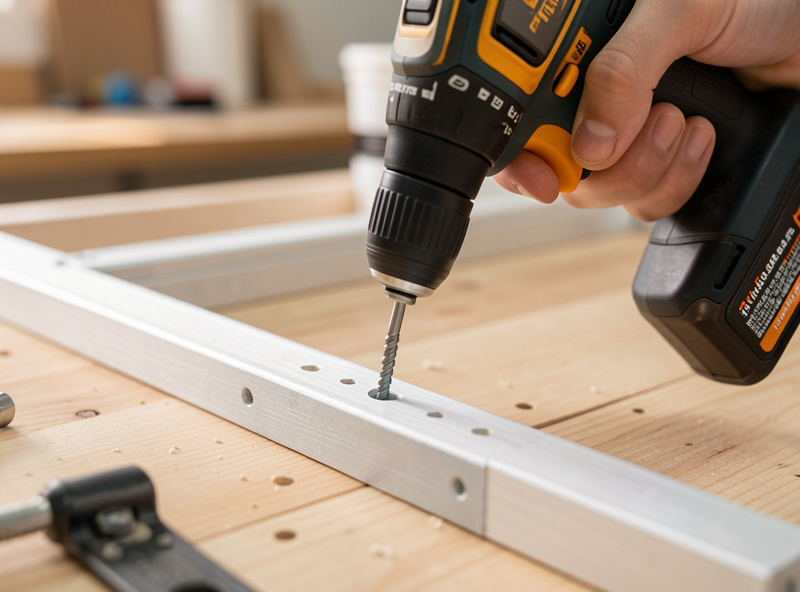
The frame mounts to the top with screws through brackets, and those brackets have a fixed pattern. Your top needs flat, solid material where those screws land. Solid wood and quality plywood are ideal. With a hollow-core or veneer-over-particleboard top you have to be careful the screws bite into something real. Dry-fit the frame on the underside of your top, mark the holes, and pre-drill pilot holes so you don’t split the wood or strip the screws. This is where a few minutes of care saves a ruined top.
Choosing the material
My honest ranking for a DIY top, balancing quality, weight, and effort:
- Solid wood / butcher block: the premium feel and durability, and a sealed slab ages beautifully. The catch is weight — check it against the frame rating.
- Quality plywood (sealed): the value sweet spot. Lighter than solid wood, plenty rigid, and a good finish looks far better than people expect. My pick for most DIY builds.
- Solid-core door: a classic cheap, rigid, flat surface — heavier than plywood but inexpensive and dead flat.
- Avoid: thin, flexy panels and hollow-core anything — they sag, they flex, and the screws have nothing to bite.
Whatever you choose, seal it. A raw wood top stains, absorbs moisture, and roughens. A few coats of a hardwearing finish make the difference between a top that looks good for a decade and one that looks tired in a year.
The tools that make it painless
You don’t need a workshop, but a few things turn this from a frustrating afternoon into a calm one. A cordless drill/driver for pilot holes and driving the mounting screws is non-negotiable — the bundled hex key is misery for a top install. A simple hardwearing wood finish to seal the surface protects your investment. And a tape measure plus a square so your top is cut and mounted straight. That’s genuinely the whole kit for most builds — the frame brings its own brackets and screws.
Mounting it right
The process is straightforward if you take it in order. Lay the top upside down on a soft surface. Position the frame on the underside, centred left-to-right and set back the right amount from the front edge for legroom and so your weight sits over the frame, not hanging off the front. Mark every screw hole. Pre-drill pilot holes sized for your screws — slightly undersized so they bite, not so small they split. Drive the screws, snug in a cross pattern, then go around again to fully tighten. Flip it up, raise it to full height, and run the wobble test: a firm push at standing height should settle instantly. If it sways, re-check the bolts before blaming the frame — a loose top mount reads exactly like frame wobble.
The cost reality, honestly
People assume DIY always saves money, and that’s only sometimes true — so let me be straight about it. At the budget end, a sheet of quality plywood or a solid-core door cut to size and sealed will usually beat the price of a factory laminate top while feeling far nicer. That’s a genuine win. At the premium end, a thick solid-wood or butcher-block slab from a good source can cost as much as or more than a factory top — you’re not saving money there, you’re buying a better surface than the factory offers at any price. So the honest framing is: DIY at the budget end saves money and improves quality; DIY at the premium end spends similar money to get something the manufacturer simply doesn’t sell. Both are valid, but go in knowing which one you’re doing rather than assuming DIY automatically means cheaper.
The other cost nobody counts is your time and the small risk of a mistake. Cutting a top wrong, splitting it on a bad pilot hole, or finishing it poorly are all recoverable but annoying. If you’re comfortable with basic tools, the time cost is an hour or two and the risk is low. If the idea of pre-drilling and sealing fills you with dread, a factory top is a perfectly honest choice — there’s no shame in buying the convenience. The DIY route rewards people who enjoy the build, not just people chasing the lowest number.
Is the DIY route worth it?
For most people who care about their setup, yes. You get a better surface, exact dimensions, and often a lower price than the factory top — in exchange for an hour of careful work and the discipline to respect the weight and thickness math. The frame is where the real engineering and money should go; the top is where you get to make it yours without paying a furniture premium. Get the frame right, weigh your top, mind the thickness, line up the bolts, and you’ll have a desk that’s genuinely better than what came in the box.
Can I put my own top on a standing desk frame?
Yes, and it is one of the best-value moves in the category. Buy the frame alone and mount a top you choose. Just respect three things: the top’s weight counts against the frame’s capacity, its thickness changes your height range, and the bolt pattern must land on solid material.
What is the best material for a DIY standing desk top?
Sealed quality plywood is the value sweet spot, light and rigid. Solid wood or butcher block feels premium but check the weight against the frame rating. A solid-core door is cheap and flat. Avoid thin flexy panels and hollow-core, which sag and give screws nothing to bite.
How heavy can a DIY desk top be?
Light enough that the top plus all your gear stays comfortably under the frame’s weight rating with margin. Remember the rating is the total the frame lifts, and a thick solid-wood slab can use a serious share of it before a single monitor goes on.
Does desk top thickness matter on a standing desk?
Yes. Thickness adds directly to every height the frame produces, raising both your minimum and maximum. Measure your correct seated and standing elbow heights first, then account for the top’s thickness so the desk still reaches your numbers at both ends.
How do I attach a top to a standing desk frame?
Lay the top upside down, position the frame centred and set back for legroom, mark the holes, and pre-drill pilot holes sized to bite without splitting. Drive the screws in a cross pattern, tighten fully, then raise to full height and run a wobble test.