The cheapest ergonomic keyboard win costs nothing: kill positive tilt, lay the board flat or on a slight negative tilt, and pull it to elbow height. Only after that does a split or tented board earn its price – and only if your measured shoulder width forces your wrists to deviate inward on a standard layout.
I have run this test enough times in my own setup log to be blunt about it. A lot of “ergonomic” keyboards are furniture. They look the part, they cost real money, and they fix a geometry problem the buyer never actually had. This guide is about buying by dimensions – tenting angle, split width, key travel, tray height – instead of the word printed on the box.

Do the free geometry fixes before you spend a cent
Before any purchase, sort out position. The three free moves – drop the board to elbow height, kill positive tilt, and leave the flip-out feet down – do more for typing comfort than most keyboards costing three figures. Get these wrong and an expensive split board just relocates the problem.
Measured at my elbow height, sitting upright in a chair set so my feet are flat, the keyboard home row should sit roughly where my forearms hang level. On most desks that means the board lives on a lower surface than the desktop – a tray, a lowered standing-desk frame, or a thinner board. If you are reaching up to type, the surface is too high, full stop.
Next, positive tilt. Almost every keyboard ships with flip-out feet at the back that lift the rear edge. Those feet feel like an ergonomic feature and are the opposite. Raising the back forces your wrists into extension – the same angle you would hold to wave at someone. Negative tilt (front edge higher than the back, or at least dead flat) keeps the wrist closer to neutral. My rule in the setup log is simple: feet stay down, and if I want any tilt at all I tilt the board away from me, not toward me. The flip-up legs are a trap, and they are free to ignore.
Once the board is at elbow height and flat, retest your typing for a week. A surprising number of people discover that was the whole fix. If your wrists still splay outward or your shoulders round in to bring your hands together, then you have a width problem a standard board cannot solve – and that is the only honest reason to spend money. For the full position picture, including where the mouse sits relative to all this, see my keyboard and mouse position guide.
The four archetypes and the dimension each one solves
Ergonomic keyboards are not one category. They are four, and each is solving a specific geometric complaint. Buy the one that matches your measured problem, not the one with the most aggressive shape. Here is how the archetypes break down against learning curve, fit and price.
| Type | What it changes geometrically | Learning curve | Who it suits | Rough price band |
| Standard low-profile / TKL | Nothing to layout; thin case lowers home-row height so it sits closer to elbow height on the desktop | None | Most people, once tilt and height are fixed; narrow-to-average shoulders | $30-120 |
| Tented one-piece | Raises the centre so each hand pronates less (palms turn toward each other instead of flat down) | A few days | People whose forearms feel rolled-flat but whose hands are already shoulder-width apart | $80-180 |
| Fully split | Two halves you place at your own shoulder width, so wrists stop deviating outward; usually tents too | One to two weeks | Broad shoulders, or anyone whose wrists bend outward to reach a one-piece centre | $120-360 |
| Contoured / columnar | Bowl or column layout that shortens finger travel and stops the diagonal stagger | Two to four weeks | Heavy typists committed to relearning; usually the last stop, not the first | $200-400+ |
Notice the price climbs with how much geometry the board changes – and so does the relearning cost. A contoured board can be excellent, but you will type slowly for a few weeks while your hands remap. That is a real cost, not a footnote, especially if you type for a living.
Standard low-profile and tenkeyless
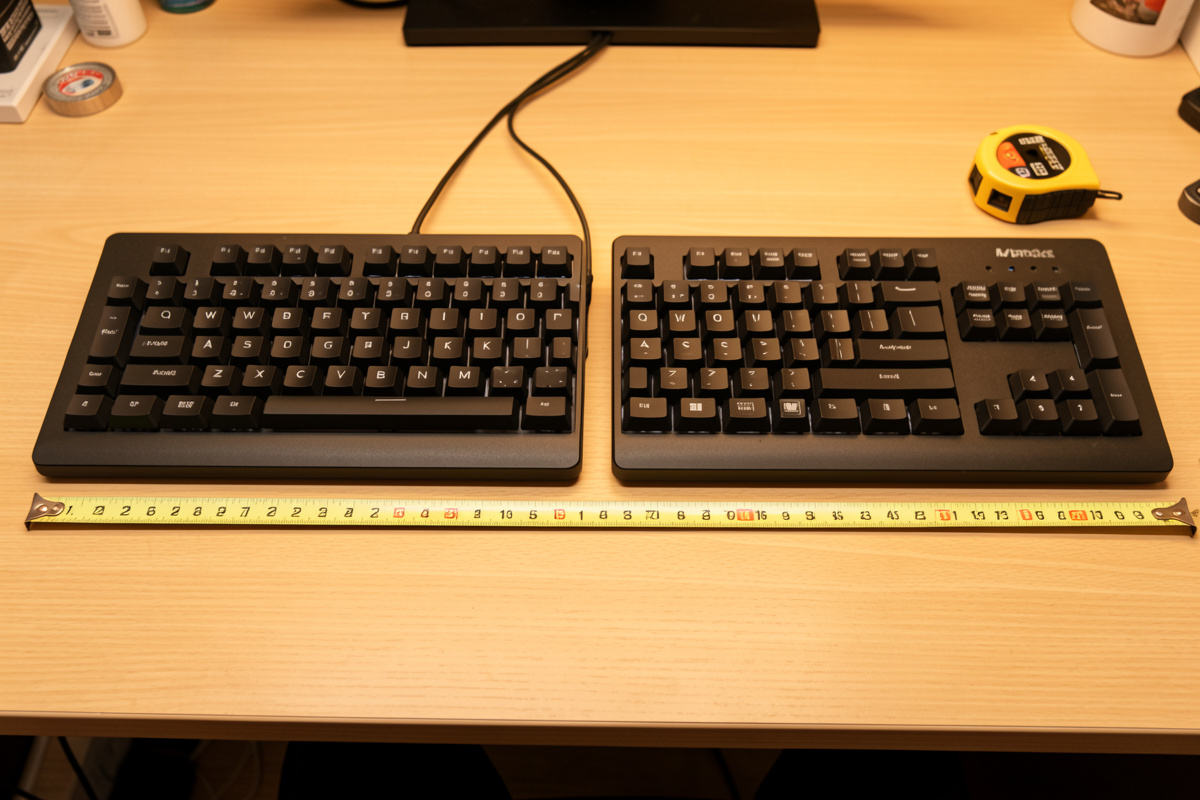
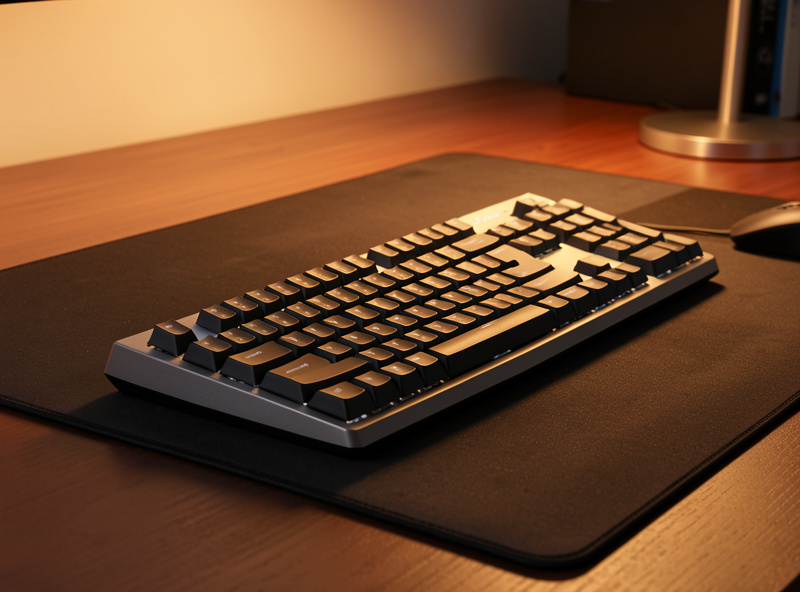
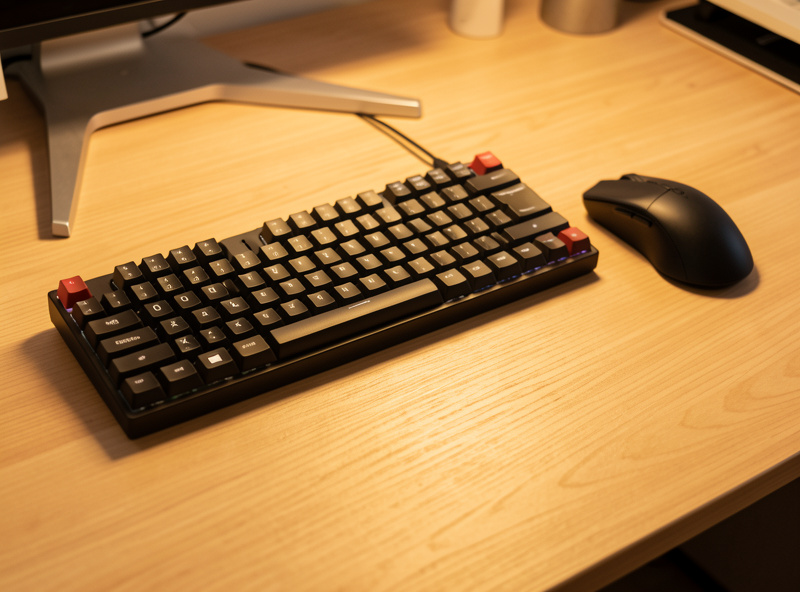
The dimension a thin board solves is height. A low-profile case puts the home row maybe 10-15mm closer to the desk than a tall mechanical, which on a fixed-height desktop can be the difference between elbow-height typing and reaching up. My budget mesh-chair desk runs a low-profile tenkeyless for exactly this reason: it is short, and dropping the numpad pulls the mouse closer, which I will come back to.
Tenting – the underrated middle option
Tenting raises the keyboard’s centre so your palms rotate slightly toward each other instead of pressing flat down. The dimension it solves is forearm pronation. If your hands sit comfortably at shoulder width on a normal board but your forearms feel rolled flat, a tented one-piece is the cheapest fix and skips the split learning curve. I keep a modest tented one-piece in rotation and measured maybe 10-15 degrees of tent as the sweet spot before the keys start feeling like they are sliding away.
Fully split
The split solves width. This is the board you buy when you have measured that your shoulders are wide enough that a centred keyboard pulls your wrists outward (ulnar deviation) or rounds your shoulders inward to bring your hands together. Two halves, placed at your own shoulder width, let the wrists run straight. It is the single most effective ergonomic geometry change for the right person – and pure furniture for the wrong one. The tell is measurable: sit square, let your hands fall naturally to the desk, and see whether they land wider than a one-piece keyboard’s home row. If they do, a split is justified. If they do not, you are buying shape for its own sake.
Contoured / columnar
Contoured boards change finger travel and the diagonal key stagger that exists only because old typewriters needed it. They can be the best-feeling keyboards once learned, but the learning is weeks, not days. I treat these as the end of the road – the board you graduate to after a split, not the one you start with.
Switches and travel: this is a comfort question, not a speed one
Switch choice is where keyboard forums lose the plot. For a setup you type on all day, switches are about feel and effort, not measurable speed. Pick the actuation force and travel that let your fingers rest lightly, then stop reading reviews. Marketing speed claims are noise.
Three numbers matter and they all live on the spec sheet. Actuation force is how hard you press before the key registers – lighter (around 35-45g) means less effort per stroke across thousands of strokes, which is the comfort lever. Travel is how far the key moves; low-profile switches shorten it, which some hands love and some find mushy. And the switch family – linear, tactile, clicky – is purely preference. There is no “ergonomic” switch type; the geometry of the board matters far more than what is under the keys.
My honest verdict from the setup log: I run lighter tactile switches on the boards I type on longest because the lighter spring is genuinely less fatiguing over a full day, and the tactile bump stops me bottoming out hard. But that is a comfort preference, not a performance claim, and I will not pretend a switch swap changed my words-per-minute. If a vendor sells you a switch on speed, ignore that part and judge it on effort and travel.
Drop the numpad to bring the mouse closer
One of the highest-value, lowest-cost moves is going tenkeyless or smaller. The numpad is roughly 100mm of board you probably do not use much, and every millimetre of it pushes your mouse hand further out to the right. The dimension you are solving here is reach.
I measured this on my own desk: switching from a full-size board to a tenkeyless pulled my mouse about 90mm closer to centre, which means my right shoulder stops reaching out and around the numpad all day. That is a geometry win the keyboard’s “ergonomic” label has nothing to do with – it is just a narrower object. If you punch a lot of numbers, a separate numpad you place on the left keeps the win while giving you the keys back. For the matching mouse-side analysis, my ergonomic mouse buying guide covers shape and grip, and if the mouse itself is the friction point, the drawing tablet as a mouse alternative is worth a look.
Tray versus on-desk
Where the board lives is half the ergonomic story. A keyboard tray earns its place when your desk is fixed-height and too tall to reach elbow height any other way; on a height-adjustable frame you usually do not need one. Decide by measurement, not by default.
On my Flexispot E7-class frame I skip the tray entirely – I just lower the whole desk until the desktop sits at elbow height, which is cleaner and gives the board a stable surface. On a fixed desk, a tray is often the only way to get a split or tented board down to elbow height without sawing the desk legs. The catch: many trays add their own positive tilt or wobble, so check the tray is flat or negative and rated to hold the board steady. A wrist pad can soften the front edge once height is right; I cover the case for and against one in my wrist pad ergonomic guide. And if you dock a laptop into this setup, the laptop keyboard is almost never at elbow height – see laptop ergonomics and docking for why an external board is non-negotiable there.
So who actually benefits – and who is buying furniture
Honest verdict: most people are well served by a thin standard board at the right height and tilt, plus going tenkeyless. The split and contoured boards are real upgrades for a measurable minority and expensive shape for everyone else. Match the board to your hands, not to the marketing.
You genuinely benefit from a tented or split board if you have measured that your shoulders are wide, your wrists deviate outward on a centred board, or your forearms pronate flat in a way fixed height and tilt do not solve. You are buying furniture if your position is already dialled in, your hands sit comfortably at the keyboard’s centre, and you are reaching for a split because it looks serious. Ergonomics researchers report that neutral wrist posture is the goal; a split only helps if your geometry was pulling you off neutral in the first place. The board cannot promise you anything about comfort it is not physically changing for your body.
If you want to shop the two categories worth most people’s money, here are the searches I would run: a split ergonomic keyboard if your width test came back wide, and a tenkeyless mechanical keyboard if the real win is just pulling the mouse closer. For a tented one-piece without the split learning curve, browse a tented ergonomic keyboard.
As an Amazon Associate I earn from qualifying purchases.
For the wider toolkit – arms, chairs, mice and the geometry that ties them together – start at my ergonomic peripheral tools guide. If you want the official workstation-setup checklist, OSHA’s computer workstations eTool is a sober, non-commercial reference.
Frequently asked questions
Is an ergonomic keyboard worth it?
Only if you have a measured geometry problem a standard board cannot fix. Drop the board to elbow height, kill positive tilt and go tenkeyless first – those free moves solve most complaints. A split or tented board is worth it when your shoulder width forces your wrists outward; otherwise it is shape you are paying for.
What is the difference between a tented and a split keyboard?
Tenting raises the keyboard’s centre so your palms rotate toward each other, solving forearm pronation while keeping one piece. A split separates the halves so you set them at your own shoulder width, solving outward wrist deviation. Many split boards also tent. Buy tented if your hands sit comfortably at centre, split if they do not.
Should I get a keyboard with feet up or down?
Down. The flip-out feet at the back create positive tilt, which bends your wrists into extension. Negative tilt or flat keeps the wrist closer to neutral. Leave the feet folded and, if you want any tilt, angle the board away from you rather than toward you.
Do switch types affect ergonomics?
Switch family – linear, tactile or clicky – is preference, not ergonomics. What matters for all-day comfort is lighter actuation force, around 35 to 45 grams, so each keystroke takes less effort, plus a travel depth your fingers like. The geometry of the board matters far more than what is under the keys.
Why go tenkeyless instead of full-size?
Dropping the numpad removes roughly 100mm of board, which lets your mouse sit closer to centre instead of reaching out past the numbers. On my desk that pulled the mouse about 90mm closer. If you need the numpad, use a separate one on the left so you keep the reach benefit.