The best monitor light bar for desk work is the one whose beam stays off your screen, lets you set color temperature, and clamps securely to your monitor’s bezel thickness. Those three things matter more than brand or price — I have run cheap bars that nailed all three and pricey ones that did not. A good bar puts roughly 400–500 lux of usable light on the keyboard area while contributing zero reflection to the screen, which is exactly what a desk lamp struggles to do.
I add a light bar to almost every workstation I build, because it solves two problems a lamp cannot: it uses no desk surface, and its optics are designed to throw light forward and down onto the desk instead of into your eyes or onto the panel. This guide is what I actually check before recommending one, in the order that matters. For where the bar fits in a full lighting plan, start with the desk lighting guide.
What a monitor light bar is and why it beats a lamp on a desk
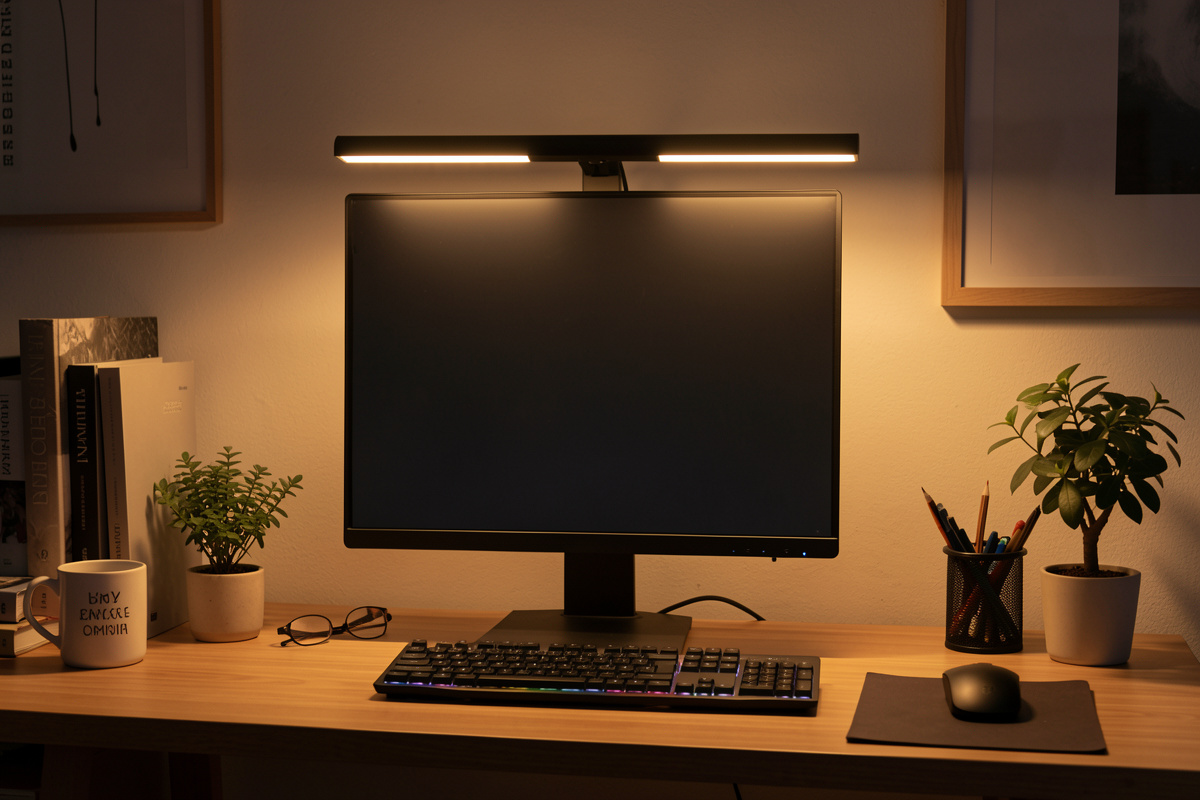
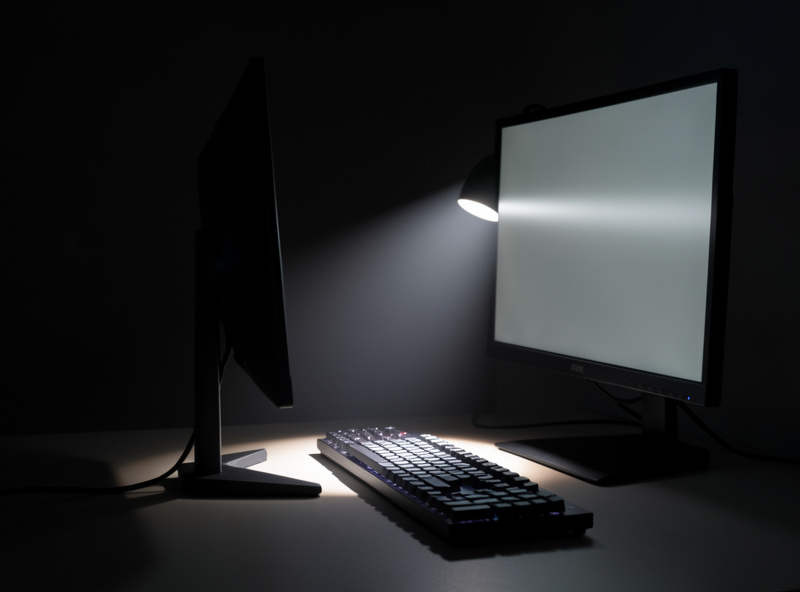
A monitor light bar is a slim LED fixture that clamps or rests on the top edge of your monitor and projects an asymmetric beam down onto the desk in front of you. The asymmetry is the whole point: the optics are engineered so light goes forward and down, not back onto the screen and not up into your face. That keeps reflected glare off the panel, which is the single most common lighting complaint at a desk.
Compared with a desk lamp, the bar wins on space and on glare control for on-screen work. It occupies the dead air above the monitor that nothing else uses, so a cluttered or small desk gains nothing to trip over. A lamp still earns its place for off-screen tasks — I cover that trade-off in the light bar vs lamp comparison — but for someone whose work is mostly looking at the screen, the bar is the higher-value first buy.
The three things that actually separate a good bar from a gimmick
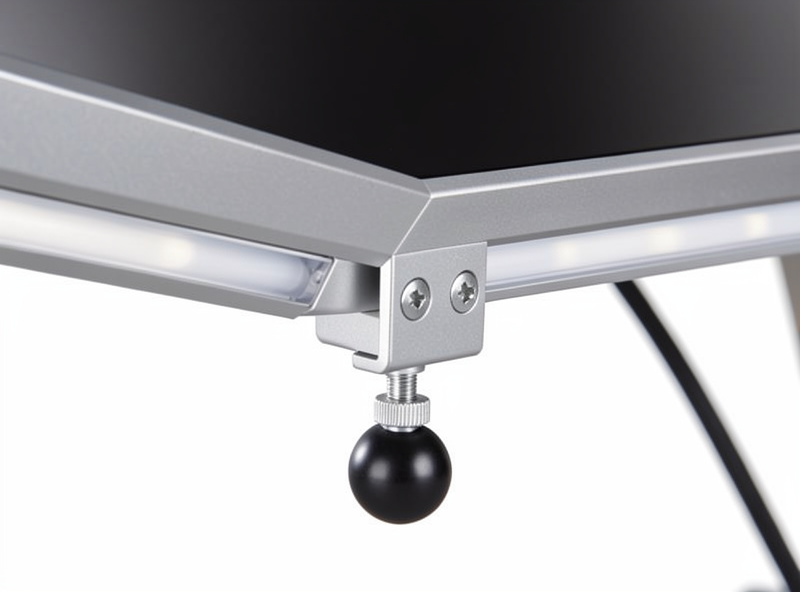
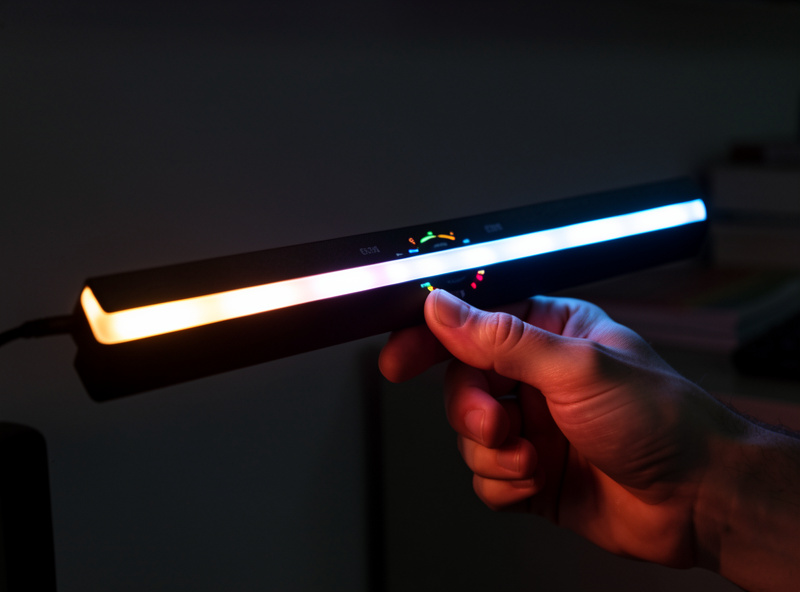
First, beam asymmetry. Turn the bar on in a dim room and look at the screen: if you see any spill of the bar’s light on the panel, the optics are poor and it will create the exact glare you bought it to avoid. Good bars keep the screen face dark. Second, adjustable color temperature — you want to run neutral or cool in daylight and warm in the evening, so a fixed-temperature bar is a compromise. Third, the mount. The clamp or counterweight has to match your monitor’s top bezel thickness; too thin a bezel and a heavy bar can tip, too thick and a small clamp will not grip.
Two secondary specs are worth a glance. CRI (color rendering index) above ~90 means colors on paper under the bar look natural, which matters if you do any physical color work. And the controls — a physical dial beats a fiddly touch strip, and some bars add a wireless puck so you are not reaching behind the monitor every time. None of those secondary points beat getting the beam and the mount right.
| What to check | Why it matters | Good sign |
|---|---|---|
| Beam asymmetry | Keeps light off the screen face | No visible spill on the panel in a dark room |
| Color temperature range | Match light to time of day | Adjustable ~2,700K to 6,500K |
| Mount fit | Stays put without tipping | Clamp or counterweight sized to your bezel |
| CRI | Accurate color on paper under the bar | CRI 90+ |
| Controls | Easy daily adjustment | Physical dial or wireless remote |
| Width | Covers the keyboard zone | Roughly two-thirds of monitor width or more |
Fitting a bar to your actual monitor
Before buying, measure two things: the thickness of your monitor’s top bezel where the bar will rest, and whether a top-mounted webcam will be in the way. Most bars use a hinged counterweight that drapes behind the screen, which works on thin bezels, but a few use a screw clamp that needs a flatter top edge. If you have a webcam clipped to the top, check that the bar’s clamp leaves room — some bars include a cutout, some do not.
Curved and ultrawide monitors add a wrinkle. A straight bar on a deeply curved ultrawide can leave the far ends of the keyboard slightly dimmer because the bar’s center sits closer to you than its ends. The fix is a wider bar or pairing the bar with a side lamp. The mounting logic is the same one I use for clamps generally — the desk thickness and clamp guide covers how to think about grip and fit even though it is written for arms.
Budget versus premium: my honest take
You do not need to spend a lot for a good light bar. The cheap end of the market has caught up on the thing that matters most — beam control — and plenty of inexpensive bars keep light off the screen perfectly well. What you pay more for is build quality, a nicer control puck, wider color-temperature range, higher CRI, and a mount that feels solid rather than springy. Those are real upgrades, but they are comfort-and-convenience upgrades, not “the cheap one doesn’t work” upgrades. My own bar is a mid-priced model with a rotary dial and a genuinely asymmetric beam; the pricier one I returned looked premium but threw a faint line of light across the top of the panel in a dark room — exactly the failure the whole category exists to avoid, and proof the price tag guarantees nothing.
My buying advice: set color-temperature adjustability and honest beam control as non-negotiable, then spend as much or as little as you like on the rest. As an Amazon Associate I earn from qualifying purchases. You can compare the field of adjustable monitor light bars on Amazon; filter for the ones that show the asymmetric beam and list a kelvin range, and ignore the ones selling on RGB party modes.
Common light bar problems and fixes
If the bar rocks or tips, your bezel is thinner than the counterweight expects — add a small adhesive pad behind the screen or choose a clamp-style mount. If you still see screen reflection, the bar is either non-asymmetric or sitting too far forward; slide it back so it overhangs the screen slightly less. If colors on paper look off, your CRI is low; there is no fix but replacement. And if the bar lights your keyboard but the rest of the desk is dark, that is expected — a bar is task light for the screen zone, not room light. Pair it with ambient and, for evening work, bias lighting behind the monitor.
Frequently Asked Questions
Are monitor light bars worth it?
For desk work, yes. A light bar adds task light over the keyboard, uses no desk space, and its asymmetric beam keeps light off the screen so it does not create glare. It is the upgrade I recommend first for anyone whose work is mostly on-screen.
Do monitor light bars cause screen glare?
A well-designed bar should not. The optics are asymmetric so light projects down and forward onto the desk, not back onto the panel. If you see any light spill on the screen in a dark room, the bar’s beam control is poor or it is positioned too far forward.
What color temperature should a monitor light bar be?
Pick a bar with an adjustable range, roughly 2,700K to 6,500K. Run neutral to cool light in daylight for focus and warmer light in the evening. A fixed single-temperature bar forces a compromise you will feel at one end of the day.
Will a light bar fit my monitor?
Measure your monitor’s top bezel thickness and check for a top-mounted webcam first. Most bars use a hinged counterweight that suits thin bezels; some use a clamp. On a deeply curved ultrawide, choose a wider bar or add a side lamp so the keyboard ends are not dimmer.
Do I need an expensive monitor light bar?
No. Inexpensive bars have caught up on beam control, which is what matters most. You pay more for build quality, higher CRI, wider color range, and nicer controls. Make adjustable color temperature and honest beam control your only hard requirements.