The best desk setup for programmers is built in this order: get the geometry right first (desk height to your elbow, monitor top at eye line, screen about an arm’s length away), then spend money on the chair, the monitor mount, and the keyboard — in that sequence. The geometry costs nothing and fixes more daily fatigue than any single purchase. I know because I’ve measured every workstation I own.
I’m Kenny, and the desk is the bench I sit at more hours than any other, so I engineered it like one. Over years of iterating my own office I’ve kept a setup log — desk height, elbow height, monitor distance and tilt for every configuration I’ve run — and the pattern is always the same: people buy gear to solve problems that a tape measure would have solved for free. This guide is the whole workstation in priority order, with the numbers I actually use, and links to the deeper spoke guides for every component.
Start With Geometry, Not Gear
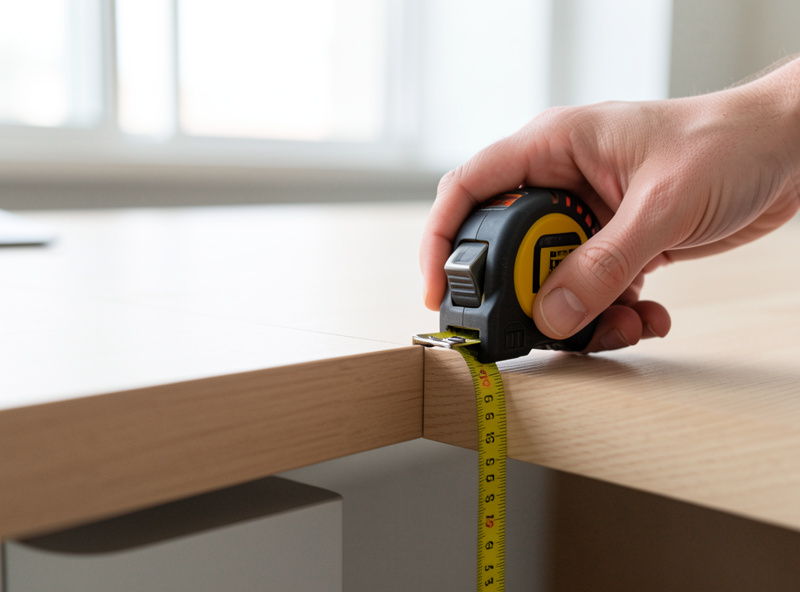
Before you buy anything, set three measurements: desk surface at your seated elbow height, the top of your main monitor roughly at or just below your seated eye line, and the screen about 50–70 cm (an arm’s length) away. These three numbers fix the majority of desk fatigue at zero cost, and they decide which gear you actually need afterward.
Here is the method I run for every coder who asks. Sit the way you actually work — not parade-ground straight, but the relaxed lean you fall into at hour six. Drop your shoulders and let your forearms come to a roughly 90-degree angle. The height where your hands float over the keys is your keyboard height, and that’s the number your desk has to hit. On a fixed desk that’s often too high, which is why a keyboard tray or a height-adjustable frame matters more than the desktop’s looks. I cover the exact procedure in my standing desk height guide and the elbow rule in the keyboard height for typing walkthrough.
The reason geometry beats gear is simple: a 1,200-dollar chair set at the wrong height is less comfortable than a 200-dollar chair set right. Dimensions first, money second. That’s the spine of everything below.
The Desk and Frame: What a Coding Workstation Actually Needs
For full days of coding, a height-adjustable frame earns its place — not for the standing novelty, but because it lets you dial the surface to your exact elbow height and change posture through a long day. A dual-motor frame in the Flexispot E7 class is the value reference: stable at full height with a normal monitor load and quiet enough to use.
The part that matters on a standing desk is the frame, not the top. I’ve load-tested mine with the same monitor array at full extension, and the difference between a wobbly single-motor frame and a braced dual-motor one is obvious the moment you type at height — the screens shiver on every keystroke on a bad frame. My FlexiSpot E7 wobble test documents exactly what that looks like, and the dual vs single motor comparison explains why the second motor is the upgrade you feel. If you’re choosing a frame from scratch, start with the standing desk frame guide — the one part of the desk worth obsessing over. A solid frame in this class sits in the dual-motor standing desk frame category.
You do not need a standing desk to set up well. A fixed desk at the right height plus a chair you can raise, with a footrest if your feet leave the floor, gets you most of the way. The standing frame just removes the compromise.
The Chair: Fit by Dimension, Not Star Rating
A coding chair is judged by fit, not by review score. The two dimensions that decide everything are seat depth versus your femur length (you want two-to-three finger widths of clearance behind the knee) and adjustable lumbar height that lands the support in the small of your back. A perfectly-rated chair that doesn’t fit your body is the wrong chair.
This is where I push people hardest, because chairs are where the marketing is thickest. I’ve lived in three tiers for months each — a premium chair bought used, a mid-tier ergonomic chair, and a budget mesh chair — and the lesson held every time: fit dimensions beat showroom minutes. A chair feels great for ten minutes and wrong at hour four if the seat is too deep for your femur. Match published dimensions to your measurements using the method in my ergonomic chair guide and the specific seat depth and femur rule.
The smart-money move is a used premium chair. A Steelcase or Herman Miller-class chair bought second-hand often costs less than a new mid-tier one and outlasts it by years — I bought mine used and would do it again. My used Steelcase or Herman Miller checklist covers what to inspect, and the mesh vs foam verdict settles the surface question. If you’re buying new, browse the ergonomic office chair field with your femur measurement in hand, not the star rating.
Monitors: How Many, How High, and What Resolution
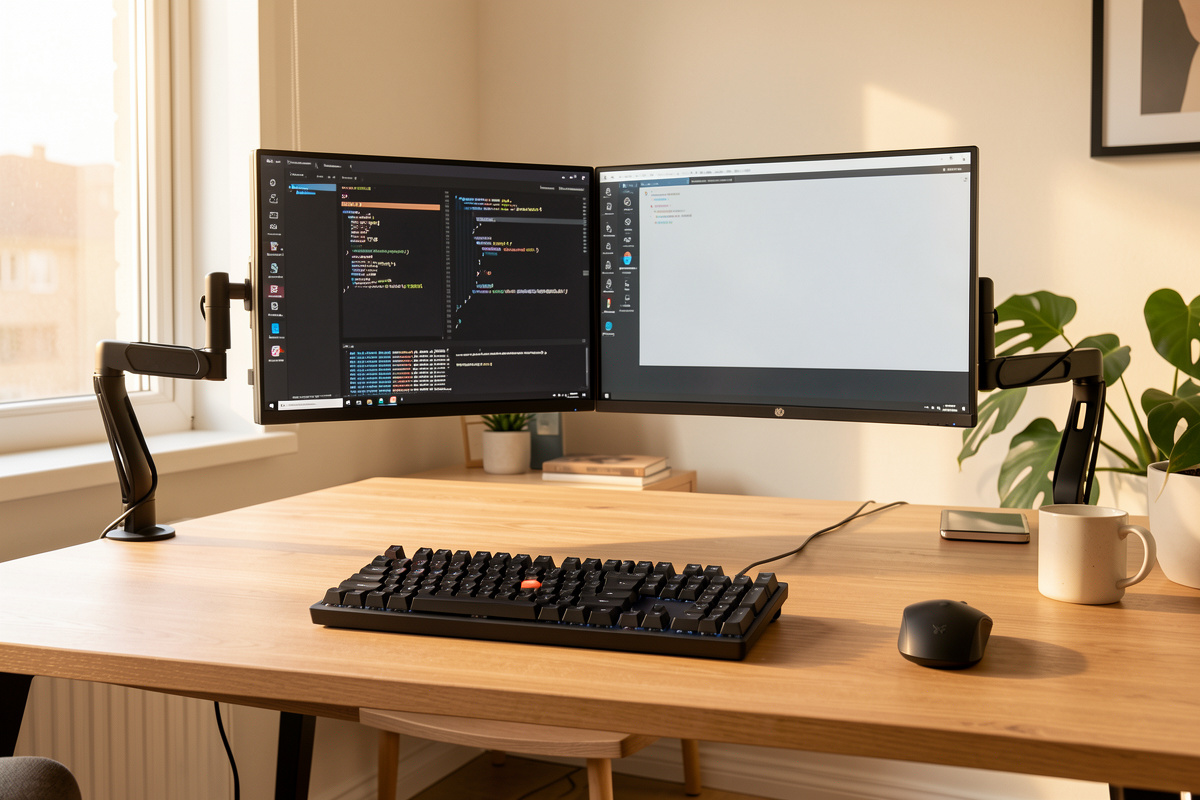
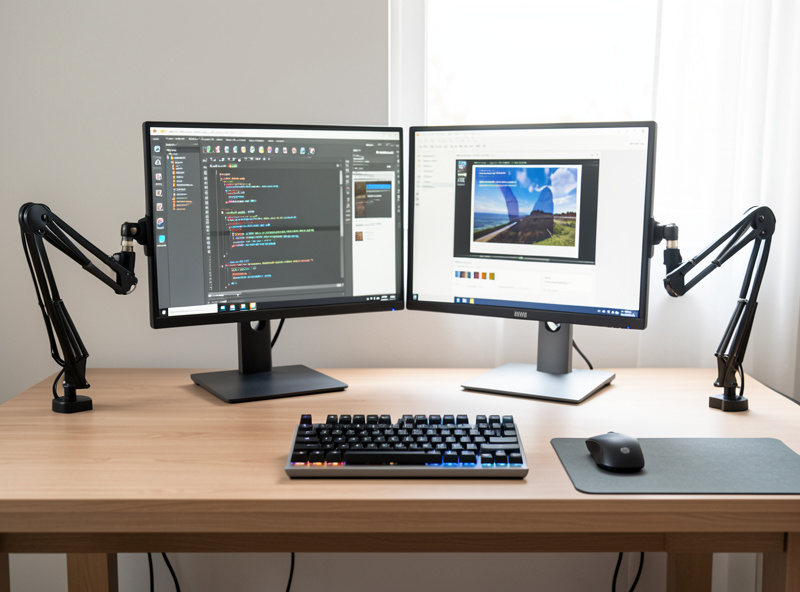
For most programmers, two monitors set at the right height beats one big screen, and a third adds value only if you genuinely fill it — code on one, reference or terminal on the second, comms on the optional third. Whatever the count, the tops should sit at eye line and each screen about an arm’s length away.
The monitor count debate is real, but it’s downstream of geometry. A second screen that sits low on its stock stand forces a constant downward head tilt; the same screen on an arm at eye level is a different experience entirely. That’s why I run everything on arms and put the geometry before the count. The full trade-off between two and three screens — desk width, neck rotation, and whether the third screen earns its place — is in my dual vs triple monitor for developers guide.
Resolution matters more for coders than gamers, because you stare at small text all day. Sharper pixels mean smaller, crisper fonts without eye strain, which is why a 1440p or 4K panel earns its keep at a coding desk — I break down the exact pixel-density math in the monitor resolution for coding guide. For the physical setup, the dual monitor setup guide and the height and angle walkthrough get the geometry right.
Get the screens onto arms. A gas-spring monitor arm clears desk space, lets you set each screen to eye level independently, and pulls them to the right distance — but only if the arm’s load rating actually matches your monitors. I verify load ratings against my real screens before buying, because the box number is a maximum, not a comfort spec. The monitor arm guide and the weight rating math cover how to choose, and you can scan current ergonomic monitor arm options once you know your monitor’s weight and VESA pattern.
The Keyboard: The One Piece You Touch All Day
Your hands are on the keyboard for the entire workday, so this is where comfort spending pays back fastest. The two decisions are the switch type (mechanical vs membrane) and the board’s layout and height. There’s no universally “best” coding keyboard — there’s the one that fits your hands and your desk height.
I keep a shared keyboard canon with my mechanical-keyboard work, and the honest take is that switch feel is preference, not performance — you don’t code faster on a particular switch, you code more comfortably on the one your fingers like. What does measurably matter is keeping the board low and flat enough that your wrists stay neutral, which is a desk-height question as much as a keyboard one. Start with the programmer keyboard selection guide for layout and the mechanical keyboard vs membrane for coders comparison for the switch decision.
Pair the board with mouse placement that keeps it close, not stretched out to the right of a full-width keyboard — a tenkeyless layout pulls the mouse inboard and reduces shoulder reach, which I measured at my own shoulder width. The keyboard and mouse positioning guide and the mouse position walkthrough cover the layout math. If you want to go down the switch rabbit hole properly, the deep mechanical-keyboard coverage at Mechkey Foundry is where I’d send you next; current boards live in the mechanical keyboard category.
Lighting for Screen-Heavy Days
Lighting is the most overlooked part of a coding desk. The goal is even, glare-free light on the desk and a softly lit wall behind the monitor so your eyes aren’t jumping between a bright screen and a dark void — a setup that matters most through dark Nordic winters when the screen is your only light source for hours.
Two pieces do the heavy lifting: a monitor light bar that lights the desk and your hands without throwing glare onto the screen, and bias lighting behind the monitor to lift the surrounding wall closer to screen brightness. The contrast between a bright editor and a black room is what tires the eyes on a long debugging session, and reducing it is pure comfort framing — I’m describing fatigue, not making any clinical claim. My coding desk lighting setup guide covers the full layered approach, and the general desk lighting guide covers lamps and glare. A good monitor light bar is the single highest-value lighting buy for a coder.
Sitting Position and the Sit-Stand Rhythm
Once the geometry is set, your sitting position mostly takes care of itself — feet flat, hips slightly above knees, lumbar in contact with the backrest, forearms level. The bigger lever for an all-day coder is movement: changing position regularly beats holding any single “perfect” pose. The best posture is genuinely the next one.
I’m careful here because this is the part of desk advice that drifts into health claims it can’t back up. I won’t tell you a chair prevents anything; what I can say from years of logging is that varying between sitting and standing, and shifting how I sit through the day, keeps me comfortable far better than freezing into one position. Ergonomics guidance such as OSHA’s computer workstations eTool reports that posture variation matters more than any single static ideal — so build a setup that makes movement easy. My ergonomic sitting position for coders guide details the geometry of a good seated position, and for laptop-first coders the laptop ergonomics and docking guide fixes the worst geometry of all.
My Priority Order If You’re on a Budget
If you can’t buy everything at once, spend in impact order. Geometry first (free), then the chair, then getting your screens onto an arm at eye level, then the keyboard and lighting. Here’s how I rank the spend against the fatigue it actually removes.
| Priority | Component | Typical Cost | Fatigue Impact | Skip If |
|---|---|---|---|---|
| 1 | Desk & monitor geometry (measure & set) | Free | Highest | Never — do this first |
| 2 | Chair (fit by dimension; buy used premium) | $150–$500 used | Very high | Your current chair already fits your femur |
| 3 | Monitor arm (screens to eye level) | $40–$200 | High | Stock stand already reaches eye line |
| 4 | Height-adjustable frame | $250–$600 | High | Fixed desk already hits your elbow height |
| 5 | Keyboard & mouse (layout + placement) | $40–$150 | Medium | Current board sits low and flat, mouse is close |
| 6 | Lighting (light bar + bias) | $30–$120 | Medium | Room already evenly lit, no screen-to-wall contrast |
The thing I want you to take from that table: the two highest-impact rows cost nothing and a few hundred used dollars. Everything below is real, but it’s refinement on top of a setup that’s already correct. Build the geometry, fit the chair, raise the screens — then iterate like an experiment, one change at a time, and keep your own setup log so you know what actually helped.
The Setup Log Method: Treat Your Desk Like an Experiment
The single habit that separates a good workstation from a guessed one is writing the numbers down. Keep a setup log — desk height, seated elbow height, monitor distance, tilt, and chair settings — and change one variable at a time. After a week you’ll know what helped instead of guessing, because you have a baseline to compare against.
This is how I run every bench I own, and the desk is just the bench I live at. My log is nothing fancy: a note with the current desk height in centimetres, the gap from my eye line to the top of each screen, the monitor-to-eye distance, and a one-line verdict after a few days. When something feels off at hour six, I don’t buy a gadget — I read the log, change one number, and live with it for a few days. Most “I need a new chair” problems turn out to be a desk that crept two centimetres too high after someone borrowed the setup. The log catches that in seconds; a shopping trip wouldn’t. The discipline of one change at a time is what makes the difference legible — change three things at once and you’ve learned nothing, even if you feel better.
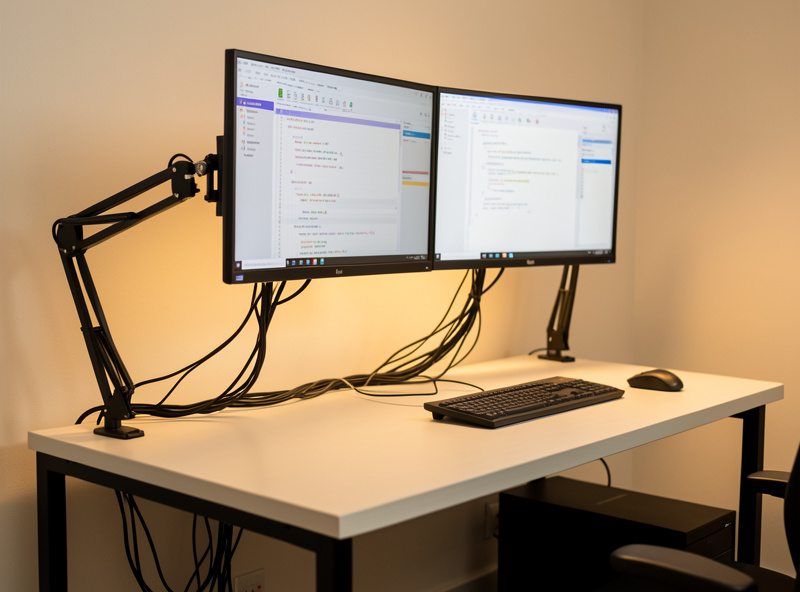
Cable Management Is Part of the Geometry
On a coding desk that moves — or even one that doesn’t — cables are a real ergonomic factor, not just tidiness. A cable spine routed under the desk keeps the surface clear so your keyboard and mouse sit where the geometry wants them, and on a height-adjustable frame it stops cords snagging as the desk travels. Clear the surface and the rest of the layout falls into place.
My approach is a single under-desk tray that carries the power strip and the slack, with cables bundled to the frame so nothing dangles into knee space. If you run monitor arms, route the screen cables along the arm and down through a grommet or over the back edge — the monitor arm desk thickness and clamp guide covers the grommet reality that decides how clean that run can be. The payoff isn’t aesthetic; it’s that a clear desk lets you pull the keyboard to your elbow height and the mouse in close without fighting a nest of cords.
Accessories: What Survived Daily Use and What Hit the Landfill
Accessories are where desk budgets quietly leak. The honest scorecard from my own setup: a good anti-fatigue mat and a proper footrest earn their place; most wrist gadgets and gimmick risers don’t. Buy the two that solve a measured problem and skip the rest until you have evidence you need them.
The anti-fatigue mat matters the moment you actually stand to work — but only the firm-but-giving ones lasted; the cheap foam slabs flattened into useless pancakes within months in my setup, so I judge mats by whether they spring back, not by thickness on the box. A footrest is the right fix when your chair is set for elbow height but your feet no longer reach the floor — common for shorter coders who’ve raised the seat to meet a fixed desk. For laptop-first programmers, a riser plus an external keyboard is the highest-value accessory there is, because docking a laptop is the only way to get the screen to eye line and the keyboard to elbow height at the same time; the laptop ergonomics and docking guide walks through exactly that. Everything else — palm rests, novelty supports, desk gimmicks — I’d treat as optional until your setup log says you have a specific problem to solve.
Putting the Whole Workstation Together
A complete programmer’s desk, assembled in the right order, looks like this: a frame at your elbow height, a chair fitted to your femur, two screens on arms with their tops at eye line and an arm’s length away, a low flat keyboard with the mouse pulled in close, even glare-free lighting, and a cable spine keeping the surface clear. None of it is exotic; all of it is measured.
If you build in that sequence you’ll spend less and end up more comfortable than someone who bought the expensive chair first and never set their desk height. The geometry is the foundation, the gear is the refinement, and the setup log is what keeps the whole thing honest over the years you’ll spend at it. Start with a tape measure today; buy the first piece of gear only once you know the number it has to hit.
For small rooms, none of this changes — the geometry rules are identical, you just fit them into less space; my small space desk guide shows how. As an Amazon Associate I earn from qualifying purchases.
Related Guides
- Best Desk Setup for Coding — the focused build for a pure coding workflow
- Programmer Keyboard Selection Guide
- Dual vs Triple Monitor for Developers
- Monitor Resolution for Coding
- Mechanical Keyboard vs Membrane for Coders
- Coding Desk Lighting Setup Guide
- Ergonomic Sitting Position for Coders
Frequently Asked Questions
What is the single most important part of a programmer’s desk setup?
Geometry. Set the desk to your seated elbow height, the monitor top at eye line, and the screen about an arm’s length away before buying anything. These three free adjustments remove more daily fatigue than any single purchase.
Do programmers need a standing desk?
No, but a height-adjustable frame helps because it lets you set the surface to your exact elbow height and change posture through a long day. A fixed desk at the right height with an adjustable chair and a footrest works too.
Two monitors or three for coding?
Two screens at the right height suit most programmers, with code on one and reference or terminal on the other. A third only earns its place if you genuinely fill it, since it adds desk width and neck rotation.
Is a mechanical keyboard better for programming?
Switch feel is preference, not performance. You do not code faster on a mechanical board, but many coders find it more comfortable over long days. Keeping the board low and flat for neutral wrists matters more than the switch type.
What is the best budget order to build a coding desk?
Set the geometry first for free, then buy a chair that fits your femur (a used premium chair is the smart-money pick), then a monitor arm to get screens to eye level, then a height-adjustable frame, then keyboard and lighting.
How far should my monitor be from my eyes when coding?
About 50 to 70 centimetres, roughly an arm’s length, with the top of the screen at or just below your seated eye line. Sharper resolution lets you sit at this distance with small, crisp fonts that are easier on the eyes.